Designing Effective Rotating Shoe Rack Plans for Small Spaces
Are you struggling to find a practical solution for your shoe storage in a small space? A rotating shoe rack can be the perfect answer. Not only does it save space, but it also keeps your shoes organized and easy to access. Here’s a guide to designing effective rotating shoe rack plans that maximize your limited area without sacrificing style or functionality.
Understanding Rotating Shoe Racks
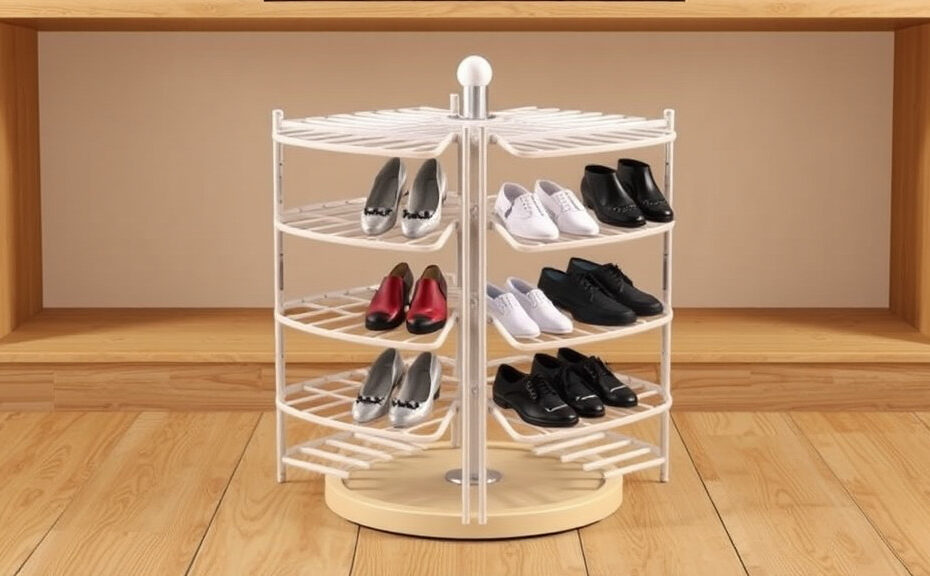
A rotating shoe rack often features multiple tiers of shelving that can spin, allowing you to see and reach different pairs of shoes without digging through them. This design is particularly beneficial for small apartments or homes, where floor space is at a premium.
Key Features of an Effective Rotating Shoe Rack
When designing your rotating shoe rack, consider these essential features:
- Space-Saving Design: A well-designed rotating shoe rack takes advantage of vertical space, which can significantly enhance your shoe storage capabilities.
- Durable Materials: Choose materials that are sturdy yet lightweight, ensuring your rack can hold a variety of shoe types without tipping over.
- Adjustable Shelves: Adding adjustable shelves allows you to customize the height for various shoe sizes, from flats to high heels.
- 360-Degree Rotation: Ensure the base is smooth and allows for effortless spinning, making it easy to view all your shoes at once.
- Attractive Finish: Choose a design and color that complements your home décor, allowing the rack to blend seamlessly into your space.
Designing Your Rotating Shoe Rack
Now that you know the key features, it’s time to design your small-space-friendly rotating shoe rack. Follow these steps:
- Measure Your Space: Start by measuring the area you plan to place the shoe rack. Consider the height, width, and depth that fit your specific needs. Ensure there’s enough room for the rack to rotate freely.
- Choose the Right Design: There are countless designs to choose from. You might want a cylindrical structure or a tiered shape. Consider your personal style and how many pairs of shoes you need to store.
- Draw a Blueprint: Sketch your plans to visualize how the rack will look. Include measurements and the configuration of the shelves. This step helps you plan the materials required.
- Select Your Materials: Opt for wood, metal, or plastic; however, ensure they are durable enough. If you anticipate heavy footwear, a sturdier material like plywood or metal may be necessary.
- Construction Tips: Use a drill for attaching shelves firmly. Wood glue can enhance durability, and consider using screws for additional strength. Smooth edges will improve safety and aesthetics.
Examples of Rotating Shoe Rack Plans
| Design Type | Dimensions (HxWxD) | Number of Pairs | Space Requirement |
|---|---|---|---|
| Cylindrical Rack | 60″x18″x18″ | 20-25 | 2 sq. ft. |
| Tiered Shelves | 48″x24″x16″ | 15-20 | 3 sq. ft. |
| Corner Rotating Rack | 72″x18″x18″ | 25-30 | 1.5 sq. ft. |
Maintenance of Your Rotating Shoe Rack
To keep your rotating shoe rack in top shape:
- Regularly check for loose screws or wobbling shelves.
- Clean the surfaces with a gentle cleaning solution to prevent dust buildup.
- Inspect for wear and tear to ensure safe operation.
Creating a rotating shoe rack that fits well in small spaces can be a rewarding project. With thoughtful planning and the right features, you’ll have a practical solution that brings both style and organization to your living area. Start measuring your space today, and let your creativity flow as you design the perfect shoe storage solution!
Benefits of Using a Rotating Shoe Rack in Your Home
One of the most ingenious innovations for organizing your footwear is the rotating shoe rack. In the hustle and bustle of daily life, it’s easy to let shoe storage slide into chaos. A rotating shoe rack can be a game-changer for homeowners. Here, we look at the myriad benefits that come with using a rotating shoe rack in your home.
First and foremost, a rotating shoe rack maximizes space. For those living in smaller homes or apartments, storage space can be limited. A traditional shoe rack can take up valuable floor space, while a rotating design allows you to utilize vertical space effectively. You can store dozens of pairs of shoes in a relatively small footprint. This makes it an efficient solution, especially for families with multiple members.
Another significant benefit is visibility. Have you ever rummaged through a disorganized pile of shoes, searching for a specific pair? With a rotating shoe rack, you can easily see all your shoes at once. This visibility helps you quickly find the right pair without frustrating hunting. This means less time wasted in the morning as you prepare to start your day.
Additionally, a rotating shoe rack promotes organization. It encourages better habits in storing your footwear. When shoes have a designated spot, they are less likely to end up scattered around the house. You can categorize your shoes, perhaps by type or occasion. Casual shoes, formal shoes, and seasonal footwear all have their place. This organization not only looks neat but also ensures that you keep your favorite on hand whenever needed.
- Space Efficiency: Maximizes storage without compromising floor area.
- Easy Access: Quickly rotate to find the shoes you want.
- Increased Visibility: Clear sight of all your options at a glance.
- Encourages Responsibility: Helps maintain an organized space.
- Promotes Shoe Care: Shoes stored correctly experience less wear and tear.
Furthermore, rotating shoe racks often come equipped with additional features. Many designs incorporate compartments for accessories like shoe polish, laces, or insoles. This added convenience means you don’t need to go far when you need to maintain your shoes. Everything is within arm’s reach, and you can easily keep your footwear in pristine condition.
Another advantage to consider is ease of maintenance. Many rotating shoe racks are made from materials that are easy to clean, such as MDF or plastic. A quick wipe with a damp cloth can restore their appearance, making them a practical choice for busy households where messiness is inevitable. You won’t have to spend precious time cleaning your shoe storage system, allowing you to enjoy a clutter-free environment.
In terms of style, rotating shoe racks come in various designs. Whether your home has a modern, traditional, or minimalist aesthetic, there’s a shoe rack to match. This versatility means you don’t have to sacrifice style for functionality. In fact, a well-chosen rotating shoe rack can enhance your decor while serving a practical purpose.
| Feature | Benefits |
|---|---|
| Space-Saving Design | Utilizes vertical space for maximum shoe storage. |
| Rotating Mechanism | Effortlessly access all your shoes with a simple turn. |
| Customizable Options | Many styles and colors to match your home decor. |
| Easy Cleaning | Materials that require little maintenance. |
| Accessory Storage | Built-in features for shoe care products. |
A rotating shoe rack can be a fun project for DIY enthusiasts. With numerous plans available online, building your own shoe rack allows for personal touches that reflect your style. Whether you prefer rustic wood finishes or sleek modern designs, creating your own rotating shoe rack can be a rewarding experience.
Incorporating a rotating shoe rack in your home offers numerous benefits. From space efficiency and easy access to stylish designs and improved organization, the advantages are compelling. By choosing a rotating shoe rack, you not only enhance your storage solutions but also add a touch of elegance to your space. Whether you buy or build one, it’s a decision that can significantly improve your daily routine and help you maintain a tidy home.
Step-by-Step Guide to Building Your Own Rotating Shoe Rack
Building your own rotating shoe rack can be a fun and rewarding project. Not only does it help keep your shoes organized, but it also saves space in your home. This guide provides a step-by-step approach to constructing a rotating shoe rack that’s both functional and stylish.
Materials You’ll Need
- Wood boards (choose the type based on your preference)
- Plywood for the base and rotating top
- Wood screws
- Wood glue
- Rotating mechanism (lazy Susan bearing)
- Sandpaper
- Wood finish or paint (optional)
- Measuring tape
- Saw (circular or hand saw)
- Drill with bits
- Screwdriver
Step 1: Measure Your Space
Before you start building, measure the space where you want to place your shoe rack. Consider how many pairs of shoes you plan to store. This will help you determine the dimensions of the shoe rack.
Step 2: Cut the Wood
Once you have your measurements, cut the wood to size. You will need four vertical boards for the sides, a base, and a rotating top. For a standard design, a height of around 36 inches and a width of 24 inches works well, but adjust this based on your needs. Here’s a simple layout:
| Part | Dimensions |
|---|---|
| Sides (4) | 36″ x 24″ |
| Base | 24″ x 24″ |
| Top (Rotating) | 24″ x 24″ |
Step 3: Create the Base
Start by assembling the base. Attach the four side boards to the base using wood screws. Make sure it is sturdy, as it will hold the weight of your shoes. You can also add a layer of plywood on top of the base for extra support.
Step 4: Attach the Rotating Mechanism
Position the lazy Susan bearing at the center of the base. This allows the top piece to rotate freely. Secure it with screws, following the manufacturer’s instructions. Make sure it is tight and stable to ensure smooth rotation.
Step 5: Construct the Rotating Top
Now, attach the plywood top to the lazy Susan bearing. Ensure everything fits well and rotates smoothly. Tip: add a perimeter around the edge if you want to prevent shoes from sliding off.
Step 6: Sand and Finish Your Rack
Use sandpaper to smooth out any rough edges on your shoe rack. Sanding helps prevent splinters and gives it a polished look. If you wish, apply a wood finish or paint to match your home décor. Allow it to dry completely.
Step 7: Organize Your Shoes
Place your newly built rotating shoe rack in your chosen location. Start organizing your shoes, placing them on the top and sides. The rotation feature allows you easy access to all pairs without needed to dig through a pile.
Tips for Maintenance
- Regularly clean the rack with a damp cloth to avoid dust.
- Occasionally check the screws and rotating mechanism for tightness.
- Consider using shoe bags or containers to keep your shoes protected and dust-free.
By following these steps, you will have created a beautiful and functional rotating shoe rack. Not only does it provide great organization for your footwear, but it also adds an interesting element to your space. Enjoy your new creation!
Creative Materials for DIY Rotating Shoe Racks
Creating a DIY rotating shoe rack can be a fun and rewarding project. Not only does it keep your favorite footwear organized, but it also saves space and adds a touch of creativity to your home. When kicking off this project, considering various creative materials can enhance both the functionality and aesthetics of your shoe rack. Below are some innovative materials you can use.
Wood
Wood is one of the most popular materials for building DIY rotating shoe racks. It’s sturdy, versatile, and allows for various design options. Here are some common types of wood you might consider:
- Pine: Affordable and easy to work with, making it ideal for beginners.
- Plywood: Lightweight yet strong, perfect for creating complex designs.
- Durable and adds a touch of elegance to your shoe rack.
When choosing wood, ensure it is well-sanded and finished to prevent splinters and damage to your shoes.
Plastic
Plastic is another great option for a rotating shoe rack. It offers several benefits:
- Lightweight: Easier to move and adjust.
- Water-Resistant: Ideal for areas prone to moisture.
- Variety of Colors: Allows customization to match your décor.
Consider using high-density polyethylene (HDPE) for durability and longevity.
Metal
If you’re looking for a modern, industrial feel, metal can elevate your shoe-rack game. Steel or aluminum frameworks can offer both strength and style.
- Steel Tubing: Great for structural support, often used for the base.
- Cables and Wires: Can be used to create minimalist designs.
- Metal Mesh: Provides visibility to your shoe collection while keeping them secure.
Ensure that any metal parts are treated to prevent rust, especially if placed in humid environments.
Cardboard
For those who want a sustainable and budget-friendly option, cardboard can be an excellent material. Though it may not be as long-lasting, it’s perfect for temporary setups or for those who want to experiment with design. You can stack or fold cardboard to create compartments and even paint it for a fun look. Remember to laminate or cover it for moisture resistance.
Recycled Materials
Using recycled materials adds a creative flair to your DIY project while being eco-friendly. Consider the following items:
- Old Wooden Pallets: Can be repurposed into stylish racks.
- Shoe Boxes: Perfect for a rotating display if outfitted inside a larger frame.
- Unused Furniture Parts: Old shelves or table legs can be reimagined as parts for your rack.
Repurposing materials not only saves money but also adds character to your shoe storage.
Fabric
Don’t underestimate the value of fabric in a creative rotating shoe rack design. Fabric can be utilized for:
- Cushioned Compartments: Add comfort for your shoes while making it easy to remove or place them back.
- Visual Appeal: Bright colors can enhance the aesthetic of any space.
- Pockets: Create fabric pockets on the outer part of the rack for accessories.
Combining Materials
For a unique design, consider combining different materials. A wooden frame with plastic compartments, or metal accents paired with fabric, can create a dynamic look that stands out. Here’s a basic combination to inspire you:
| Material | Functionality | Aesthetic Appeal |
|---|---|---|
| Wood + Metal | Sturdy structure | Industrial chic |
| Plastic + Fabric | Lightweight, water-resistant | Colorful and fun |
| Recycled + Wood | Eco-friendly, sustainable | Rustic character |
Creating a DIY rotating shoe rack is not only an enjoyable project but also a practical way to organize your shoes. By selecting the right materials—whether wood, plastic, metal, or even recycled items—you can craft a unique storage solution that fits your style and space perfectly. So gather your materials and get started on making the wardrobe space of your dreams!
How to Maintain and Organize Your Rotating Shoe Rack
If you’ve invested in a rotating shoe rack, you’re already making strides toward a neat and organized space for your footwear. These handy racks not only save space but also make it easy to see and access your shoes. However, simply having a rotating shoe rack is not enough. Regular maintenance and organization are crucial to keep it functional and clutter-free. Here’s how you can effectively maintain and organize your rotating shoe rack.
Keep It Clean
Regular cleaning is essential to maintain the look and functionality of your rotating shoe rack. Here are some easy steps to follow:
- Dust Regularly: Use a soft cloth or a duster to remove dust from your rack. Neglecting this can lead to a build-up that becomes harder to clean.
- Wipe Down: Every few weeks, wipe the surfaces with a damp cloth. If you’re dealing with stubborn stains, a mild soap solution will work.
- Disinfect: Consider using a disinfecting spray on the areas that come into contact with your shoes to keep bacteria at bay.
Organize by Type and Occasion
One of the best ways to maintain order is by organizing your shoes logically.
- Group Similar Shoes: Keep sandals, sneakers, heels, and boots in their respective sections. This makes it quicker to find what you need.
- Occasion-Based Storage: Organize your shoes by occasion—work, casual outings, and special events. This can save you time when you’re getting ready.
Use Inserts and Dividers
To keep your rotating shoe rack even more organized, consider adding inserts or dividers. Here’s how:
- Use Shelf Dividers: These can help keep shoes separated from one another, preventing them from sliding around.
- Inserts for Smaller Shoes: For smaller shoes or slippers, use shoe inserts to utilize vertical space efficiently.
Rotate Your Shoes Seasonally
Your rotating shoe rack offers you the perfect opportunity to rotate shoes seasonally. Here’s a simple guide:
- Spring: Store away winter boots and bring out lighter options like sandals and flats.
- Summer: Keep flip-flops and airy shoes readily accessible while tucking away closed-toe shoes.
- Fall: Make room for ankle boots and sneakers as temperatures begin to drop.
- Winter: Ensure your warm boots are easy to access.
Regularly Assess Your Collection
It’s essential to periodically review your shoe collection to keep your rack organized:
- Check for Damage: Look for any damaged or worn-out shoes that may need repairs or replacements.
- Declutter: If you haven’t worn a pair in over a year, consider donating it, as it frees up space.
Use Shoe Care Products
To maintain the integrity of your footwear, consider investing in shoe care products. This helps your shoes last longer and stay looking great:
- Shoe Trees: Use wooden or plastic shoe trees to maintain the shape of your shoes.
- Waterproof Sprays: Protect your shoes from elements by applying waterproof sprays, especially on expensive pairs.
- Shoe Polish: Regularly polish your leather shoes to keep them looking new and vibrant.
Maintaining and organizing your rotating shoe rack is an ongoing process, but one that pays off in the long run. Not only does it save you time, but it also keeps your space looking tidy and inviting. By regularly cleaning, organizing, and assessing your shoe collection, you can turn your rotating shoe rack into a wonderful showcase for all your favorite pairs.
| Task | Frequency |
|---|---|
| Dusting | Weekly |
| Wiping Down | Every Few Weeks |
| Deep Clean | Seasonally |
| Shoe Rotation | Seasonally |
With these strategies in place, you will find that your rotating shoe rack not only appears beautiful but also serves its purpose effectively. Happy organizing!
Key Takeaway:
Creating a rotating shoe rack is an excellent way to maximize your space while keeping your footwear organized. One of the key takeaways from the article is that effective rotating shoe rack plans can be adapted to fit small spaces, which is especially beneficial for urban dwellers or anyone struggling with limited storage. By using vertical space efficiently, a rotating shoe rack allows you to house a greater number of shoes without the clutter and chaos typical of traditional storage solutions.
Moreover, the benefits of a rotating shoe rack extend beyond mere organization. This stylish addition to your home can enhance your décor, streamline your morning routine, and make it easier to find the right pair of shoes quickly. A well-designed rotating shoe rack not only declutters your space but can also serve as a unique focal point in your entryway or bedroom.
For DIY enthusiasts, the article provides a detailed step-by-step guide to building your own rotating shoe rack. This allows you to customize the construction to your own style and storage needs. The guide emphasizes using simple materials readily available at your local hardware store, which makes the project accessible even for beginners. creative materials like reclaimed wood, PVC pipes, or even old furniture can also provide a sustainable twist to your DIY project, showcasing your personality while reducing waste.
Another important point made is the maintenance and organization of your rotating shoe rack. Regularly cleaning your shoes and reorganizing them according to frequency of use or type can help maintain not just the rack itself but also make your daily routine more efficient. Keeping your shoes in good condition will extend their lifespan and ensure that your shoe rack remains a functional and aesthetic part of your home.
In essence, investing time and resources into crafting a rotating shoe rack will pay dividends in terms of space efficiency, organization, and style. It’s an enriching DIY project that can elevate your home while offering practical benefits.
Conclusion
Creating a rotating shoe rack can transform the way you store and access your footwear, especially in a small living space. By designing effective plans tailored to your environment, you not only maximize storage but also enhance the overall aesthetic of your home. The numerous benefits of a rotating shoe rack, such as improved organization and easy access, make it a valuable addition to any closet or entryway.
Building your own rotating shoe rack offers a rewarding DIY experience. The step-by-step guide provided equips you with the knowledge to take on this project confidently. Plus, exploring creative materials allows you to customize your rack based on your personal style and the existing décor of your home. Whether you prefer wood, metal, or repurposed items, the possibilities are endless.
To ensure your rotating shoe rack remains functional and attractive, regular maintenance and organization are key. Keeping it tidy and well-kept will not only prolong its lifespan but also make finding your favorite pair of shoes a breeze. Regularly decluttering and organizing will ensure that your footwear collection is easily accessible.
Ultimately, a rotating shoe rack is more than just a storage solution; it’s a smart way to manage your space while keeping your shoes in great condition. Embracing this DIY project empowers you to take control of your closet and adds a personal touch to your home. So gather your materials and start planning today, and enjoy the beauty and convenience of your new rotating shoe rack.