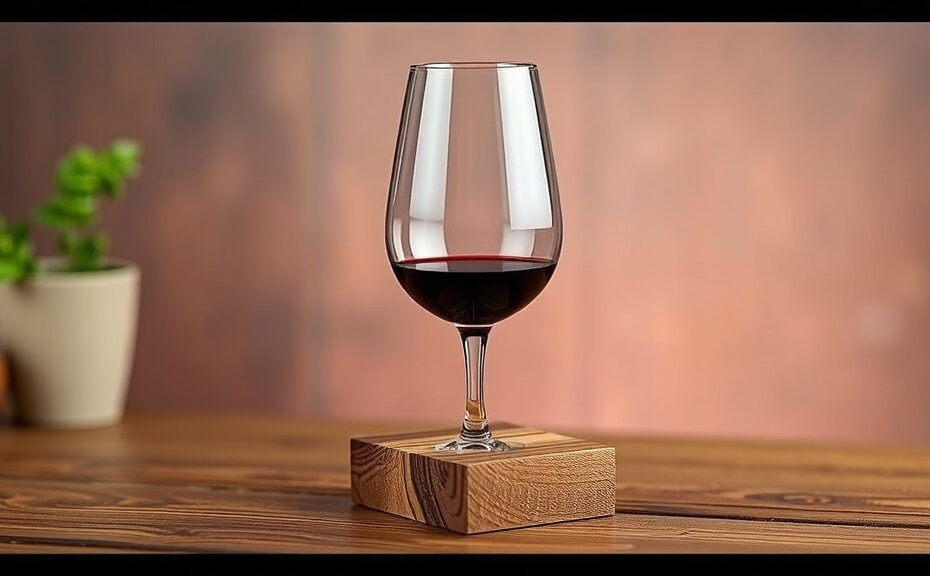
Step-by-Step Guide to Crafting a Wooden Wine Glass Holder
Crafting a wooden wine glass holder is an enjoyable project that combines creativity with practicality. Whether you want a rustic addition to your home or a unique gift idea, a handmade wine glass holder serves both purposes wonderfully. This guide will walk you through the step-by-step process to create a beautiful wooden wine glass holder, ensuring you get the results you want while having fun along the way.
Materials Needed
- 1 piece of wood (dimensions: 12 inches x 6 inches x 1 inch)
- Wood stain or paint (optional)
- Sandpaper (medium and fine grain)
- Drill with drill bits (1-inch hole saw bit recommended)
- Wood glue
- Clamps
- Paintbrush (if staining or painting)
- Measuring tape or ruler
- Pencil
Step 1: Measure and Mark the Wood
Start by measuring your piece of wood. With your measuring tape or ruler, mark the center point along the length of the wood. For a standard wine glass, you will need to make circular holes where the glass stems will sit. Use your pencil to draw these holes, spacing them about 4-5 inches apart. This ensures the glasses sit comfortably without being too close together.
Step 2: Drill Holes
Now, it’s time to create the holes for the wine glasses. Using a drill with the hole saw bit, position the drill over each circular mark you’ve made. Drill straight down with a steady hand, making sure to keep your force consistent. Avoid going too fast, as this can splinter the wood. Repeat this step for every marking created.
Step 3: Sand the Wood
After drilling the holes, the edges may be rough. Take your medium-grain sandpaper and carefully sand down each hole. This step will ensure that there are no splinters or sharp edges, making it safer to use. Once you’ve sanded the holes, use fine-grain sandpaper to smooth the entire surface of the wood, including the edges. Sanding is an important step for a clean and polished look.
Step 4: Stain or Paint the Holder
If you wish to add color or enhance the wood’s natural beauty, now is the time to apply wood stain or paint. Choose a color that complements your decor. Using a paintbrush, carefully apply the stain or paint over the entire holder, including the drilled areas. Allow it to dry as per the product’s instructions before proceeding to the next step.
Step 5: Assemble and Secure
After the paint or stain has dried completely, it’s time to assemble your wine glass holder. If you want your holder to have a base, cut another piece of wood (dimensions: 12 inches x 6 inches x 1 inch) and apply wood glue to the bottom of your main piece. Carefully place it onto the base, making sure it is centered. Secure the two pieces together with clamps and allow the glue to set according to the instructions provided.
Step 6: Final Touches
Once the glue has dried, check to ensure everything is solid and secure. You can do a final sanding if you notice any rough spots. This is also a great time to check for any uneven surfaces. If you wish, you can add varnish for extra shine and protection.
Benefits of Creating Your Own Wine Glass Holder
Making your own wooden wine glass holder has its perks. Not only does it add a personal touch to your home, but it also makes for a great conversation starter when guests come over. Plus, it can be customized to suit your taste and décor. You can experiment with sizes, shapes, and colors, making it truly unique!
Crafting a wine glass holder from wood is a straightforward project that yields beautiful results. Gather your materials, follow these simple steps, and enjoy the process. Before you know it, you’ll have a handmade accent piece that adds charm to your gatherings.
Essential Tools and Materials for Building Your Wine Glass Holder
Creating a wine glass holder out of wood is a fun project that can enhance your home decor while also serving a practical purpose. Before diving into the build, it’s essential to gather the right tools and materials. Here’s a comprehensive list to help you successfully complete your project.
Essential Tools
Having the correct tools makes the process of building your wine glass holder smooth and efficient. Here’s what you’ll need:
- Measuring Tape: Accurate measurements are crucial for cutting your wood to the right size.
- Square: This tool ensures your cuts are straight and your corners are square. It’s vital for creating a professional-looking finish.
- Wood Saw: A hand saw or a power saw will help you cut the wood to the desired dimensions.
- Drill: Use a drill to make holes for screws or to create openings for your wine glasses.
- Screwdriver: This is necessary for assembling the pieces of your wine glass holder securely.
- Sander or Sandpaper: Sanding helps smooth out surfaces and edges to prevent splinters.
- Pencil: A simple pencil is essential for marking measurements before cutting.
Key Materials
After collecting the tools, the next step involves choosing the right materials for your wine glass holder. The materials will significantly affect the look and durability of your holder.
- Wood: Select a sturdy type of wood for the main structure. Popular options include pine, oak, or cedar. Choose a thickness that can support the weight of your glasses.
- Wood Glue: Strong adhesive will help bond joints, ensuring a firm and stable build.
- Screws: Use wood screws to secure your pieces together. Make sure they are appropriately sized for the thickness of your wood.
- Stain or Paint: If you’d like to add a personal touch, consider staining or painting your wood after assembly.
- Finish: A protective finish or sealant will enhance the wood’s longevity and provide a smooth surface.
Additional Accessories
Depending on your design, you may also want to consider some additional elements:
- Brackets or Supports: These can add extra stability to your holder if you’re building a larger design.
- Foam or Felt Pads: Placing these on the bottom of the holder can protect your surfaces and prevent slipping.
- Hooks: If your design incorporates hanging elements, hooks are necessary for storing wine glasses securely.
Safety Gear
While working on your project, don’t forget to prioritize safety. Here’s a list of safety gear you should use:
- Safety Glasses: Protect your eyes from dust and debris while cutting or sanding.
- Ear Protection: If you’re using power tools, wearing ear protection can help prevent hearing damage.
- Dust Mask: A mask can help keep you from inhaling sawdust, especially when sanding.
- Work Gloves: Using gloves can protect your hands from sharp tools and rough materials.
Now that you have a solid understanding of the necessary tools and materials for building your wine glass holder, you’re equipped to get started on your project. Remember to take your time, measure carefully, and enjoy the creative process. With the right preparation, you’ll be well on your way to crafting a beautiful and functional addition to your home. Happy building!
Creative Design Ideas for Custom Wine Glass Holders
Creating a custom wine glass holder can elevate your home decor while also serving a practical purpose during gatherings. Whether you are planning a cozy dinner party or enjoying a relaxing evening, having a well-designed wine glass holder can enhance the experience. Below are some creative design ideas that can help you craft the perfect wine glass holder out of wood.
Rustic Charm with Stained Wood
Stained wood brings a rustic charm to any setting. Choose a rich wood like oak or walnut, and use wood stain to bring out the natural grain. Here’s how to make one:
- Materials: Wood board (2×6 inches), wood stain, sandpaper, wood glue, and varnish.
- Process: Sand the wood until it’s smooth for a polished look.
- Apply the stain to give it depth and character. Let it dry thoroughly.
- Use a drill to create holes that fit the base of your wine glasses. Ensure the spacing allows for balance.
- apply a coat of varnish for protection.
Modern Minimalist Design
If you prefer a sleek and modern aesthetic, a minimalist wine glass holder can be a perfect choice. This design often uses clean lines and geometric shapes to create an eye-catching piece. To craft a minimalist holder:
- Materials: Plywood, wood finish, and rope or metal brackets.
- Process: Cut two rectangular pieces of plywood and join them with brackets to form a stand. Ensure the holder is sturdy.
- Using a drill, carve out circular shapes where the wine glasses will be placed. The holes should be snug to keep the glasses secure.
- Finish the wood with a clear coat to preserve its natural color.
This design not only holds your wine glasses but also acts as a stylish conversation starter.
Artistic Sculptural Holder
For those looking to make a statement, an artistic sculptural holder can transform a functional item into a piece of art. This design allows for creativity and uniqueness. To create this type of holder:
- Materials: Driftwood or reclaimed wood, wood glue, paint, and decorative elements.
- Process: Arrange pieces of driftwood into a sculptural design that appeals to your taste.
- Glue the pieces together, ensuring stability. You can either leave it natural or paint it to match your decor.
- Choose where to carve out holes for the wine glasses. Create a balanced look while ensuring easy access.
Decorative Wall-Mounted Holder
Saving countertop space is essential, especially in smaller areas. A wall-mounted wine glass holder can be both functional and decorative. Here’s a way to make one:
- Materials: A wooden shelf, hooks, and mountings.
- Process: Cut the shelf to your desired length. Consider a length that accommodates at least four glasses.
- Mount the shelf securely to the wall. Select stylish hooks that will hold the glasses by their stems.
- Customize with paint or stain to make it fit in with your existing decor.
Multi-Functional Wine Glass and Bottle Holder
A combination holder that can accommodate both wine bottles and glasses can be perfect for gatherings. Here’s how you can create a practical multi-functional design:
- Materials: A wooden crate, multiple dowels, and finish of choice.
- Process: Sand the crate to smooth out any rough edges. Drill holes into the side for dowels that will hold the glasses.
- Finish the wood with a protective stain or paint for aesthetics.
- This design allows you to store the wine bottles below while showcasing your favorite glasses on display.
With these creative design ideas, you can easily make a wine glass holder out of wood that not only complements your home decor but also serves a practical function. By utilizing different techniques and materials, you can create a piece that speaks to your personal style. Whichever design you choose, your guests will surely appreciate the thoughtful touch at your next gathering.
Tips for Finishing and Protecting Your Wood Wine Glass Holder
Creating a wine glass holder out of wood is a rewarding project that can enhance your living space and keep your wine glasses safe. To ensure that your finished product remains beautiful and functional, you need to give it some special attention during the finishing and protection stages. Here are some effective tips to help you achieve the best results.
Choose the Right Wood Type
The type of wood you select plays a significant role in the final appearance and durability of your wine glass holder. Hardwoods like oak, maple, and cherry are excellent choices as they are sturdy and have fine grains. If you prefer a more budget-friendly option, softwoods like pine can work well, too, but they may require more care and maintenance.
Sand Your Wood Properly
Sanding is a crucial step in preparing your wood for finishing. Start with a coarse grit sandpaper, typically around 80 to 120 grit, and gradually work your way to a finer grit (220 or higher). This process will help smooth out any rough spots and ensure that your wood has a polished finish. Remember to sand in the direction of the wood grain to avoid scratches. A well-sanded piece will absorb the finish more evenly and look stunning when completed.
Consider Staining Your Wood
If you want to enhance the natural beauty of the wood, consider applying a stain before finishing. Wood stain helps to enrich the grain patterns and adds depth to the color. When selecting a stain:
- Choose a color that complements your décor.
- Test the stain on a small, inconspicuous area first to see how it looks.
- Apply evenly with a brush or cloth and wipe off any excess.
Apply a Protective Finish
Once your wood is stained and dry, it’s time to apply a protective finish. There are several options, each with its benefits:
- Polyurethane: This is a popular choice due to its durability and water resistance. It’s available in oil-based and water-based formulas, with oil-based providing a warmer tone and water-based drying clear.
- Shellac: Shellac provides a warm glow but is less durable compared to polyurethane.
- Lacquer: Lacquer dries quickly and gives a high-gloss finish, making your wine glass holder shine.
For best results, apply at least two or three coats of your chosen finish, allowing adequate drying time between each coat.
Ensure Proper Application Techniques
When applying the finish, use a high-quality brush or spray application for even coverage. Avoid over-brushing, as this can lead to streaks and uneven areas. Apply thin layers to reduce the risk of drips and sags. Remember, patience is key; it’s better to have multiple thin coats than one thick one.
Allow Enough Drying Time
Drying time can significantly vary based on the type of finish chosen. Be sure to read the manufacturer’s instructions and follow their recommendations to allow your wood wine glass holder to dry thoroughly before using it. This step is crucial to ensure that the finish hardens and protects the wood correctly.
Consider Adding a Final Coat for Extra Protection
If you anticipate heavy use, consider adding a topcoat designed specifically for extra protection. This layer can help guard against scratches and spills, ensuring your wine glass holder remains in great shape. For wooden items that may come in contact with water, a marine varnish or specialized waterproof polyurethane can offer an added line of defense.
Regular Maintenance
To keep your wine glass holder looking stunning over time, regular maintenance is essential. Here are some easy steps:
- Dust it regularly to prevent dirt buildup.
- If it gets wet, wipe it dry immediately.
- Reapply the protective finish every few years, depending on wear and tear.
By following these tips, you can ensure that your wood wine glass holder is not only functional but also remains a beautiful piece in your home. Taking the time to finish and protect your wood properly will allow your creation to stand the test of time while showcasing your craftsmanship for years to come.
Benefits of Making a Wine Glass Holder as a DIY Project
Creating a wine glass holder as a DIY project is more than just a fun way to spend your time; it also has numerous benefits that can enhance your home and lifestyle. Whether you’re looking to upcycle materials, impress guests, or simply craft something beautiful, making a wine glass holder provides a satisfying outlet for your creativity. Let’s explore the various advantages of engaging in this project.
Cost-Effective Crafting
One of the primary advantages of making a wine glass holder out of wood is the cost-saving aspect. Ready-made holders can be surprisingly expensive, especially if you’re looking for quality. By creating your own:
- You can choose affordable materials, like reclaimed wood or scrap pieces, significantly lowering costs.
- You can avoid retail markups, putting your money toward more wine for your gatherings instead!
Personal Touch
Customizing your wine glass holder allows you to add a personal touch to your home décor. Unlike store-bought items, your DIY project can reflect your unique style, enhancing the overall aesthetic of your space.
- Choose colors, stains, and finishes that integrate seamlessly into your existing décor.
- Incorporate personalized designs or engravings that can capture special memories or occasions.
Skill Development
Engaging in a DIY project enhances your woodworking skills. As you follow instructions or experiment creatively, you’ll find yourself picking up new techniques. Some skills you might develop include:
- Measuring, cutting, and assembling wood accurately, which is fundamental in all woodworking.
- Learning to use tools safely and effectively, from saws to sanders.
- Understanding basic woodworking terminology.
These skills can be applied to future projects beyond just wine glass holders, making this a worthy investment of your time.
Social Connector
Making a wine glass holder can become a social experience, perfect for gatherings with friends or family. Consider these options:
- Host a DIY night where everyone creates their own holders, leading to great memories and laughter.
- Use the finished product as a unique, handmade gift, strengthening relationships through personalized gestures.
This activity not only fosters creativity but also cultivates connections among people.
Environmental Impact
Building your wine glass holder from wood promotes sustainability in various ways:
- Using reclaimed wood helps reduce waste, giving new life to materials that might otherwise end up in landfills.
- Choosing eco-friendly stains and finishes can further minimize environmental impact.
By pursuing this project, you’re making a conscious choice to benefit the planet while enjoying a rewarding creative outlet.
Functional Elegance
A wine glass holder serves a practical purpose, providing a dedicated space for your wine glasses. This helps keep your glasses safe and organized, especially when entertaining. The benefits of functionality include:
- Reduction in the likelihood of broken glassware, as everything has its designated spot.
- Easier access to your glasses, making it simple to grab one for a quick drink.
The combination of elegance and utility elevates your gatherings, impressing your guests with not only your drinks but also your well-organized setup.
Creativity Unleashed
Creating a wine glass holder is a fantastic way to express your creativity. Every design, from sleek minimalism to rustic charm, showcases your personal flair. Engage your imagination by:
- Experimenting with different shapes and sizes.
- Integrating lighting, decorative elements, or even other materials like metal or glass.
This freedom of experimentation allows you to craft something truly special, making it worthy of display in your home.
Ultimately, the experience of crafting a wine glass holder from wood is enriching and filled with benefits. From honing your skills to creating a beautiful piece for your home, each aspect of this DIY project enhances your personal and social life. So gather your materials and let your creativity flow, as you create a practical and stylish addition to your space.
Conclusion
Creating a wooden wine glass holder is both a rewarding and practical DIY project that enhances your entertaining experience. By following the step-by-step guide provided, you can efficiently craft a stylish and functional piece that showcases your personal flair. The essential tools and materials highlighted earlier ensure that your project runs smoothly, giving you everything you need to create a quality product.
Exploring creative design ideas allows you to customize your wine glass holder to fit your taste and décor, whether you prefer a minimalist aesthetic or something more intricate. Additionally, investing time in finishing and protecting your wooden holder not only enhances its appearance but also prolongs its life, ensuring your efforts will be enjoyed for years to come.
Taking on this DIY project brings numerous benefits. Not only do you have the satisfaction of creating something with your own hands, but you also gain a unique piece that can spark conversations at gatherings. Furthermore, a custom wine glass holder makes a thoughtful gift for friends and family who appreciate wine or entertaining.
By making your own wine glass holder, you infuse your space with a touch of craftsmanship and style. So grab your tools and materials, let your creativity guide you, and enjoy the process of crafting a beautiful addition to your home! Happy woodworking!