How to Build Your Own Table: A Step-by-Step Guide
Building your own table is not only a rewarding project but also allows you to create a piece that fits your specific needs and style. Whether you want a rustic farmhouse table or a sleek modern design, crafting your own table can be an exciting journey. With the right tools, materials, and instructions, you can make a table that friends and family will admire.
Before starting, gather your materials and tools. Here’s a simplified list:
- Materials:
- Wood planks (choose the type based on your desired finish)
- Wood screws
- Wood glue
- Finish (stain or paint)
- Sandpaper
- Tools:
- Saw (table saw or circular saw)
- Drill
- Screwdriver
- Measuring tape
- Clamps
Once you have everything ready, let’s move step by step through the building process.
1. Measure and Plan: First, decide the dimensions of your table. A standard dining table is about 28 to 30 inches high, with a width of 36 to 48 inches, and a length that fits your space. Sketch your table design on paper, indicating all measurements. This plan will guide you in cutting your wood parts accurately.
2. Cut the Wood: Using your saw, cut the wood planks according to your measurements. Typically, you’ll need a tabletop, legs, and support pieces. Be careful and precise while cutting, as this will affect the final look of your table.
3. Assemble the Tabletop: Lay the board pieces of your tabletop side by side. Use wood glue on the edges where they meet, then clamp them together tightly. Allow the glue to dry according to manufacturer instructions. This will create a sturdy and seamless surface.
4. Prepare the Legs: Cut your wood for the table legs as per your design. You can opt for straight legs, angled legs, or even a pedestal base. Once cut, sand down the edges to smooth any rough spots.
5. Attach the Legs: Use screws to attach each leg firmly to the underside of the tabletop. Ensure they are evenly positioned for balance. Adding corner brackets can provide additional strength if needed. Make sure everything is aligned properly before securing them tightly.
6. Add Support Beams: For added stability, consider adding cross support beams between the legs underneath the table. This helps prevent wobbling. Cut these beams based on the width between the legs and screw them in place.
7. Sand the Surface: Once assembled, use sandpaper to smooth all surfaces of the table. Focus on areas where the wood may have splinters or rough patches. A smooth surface will help the finish adhere better and provide a clean look.
8. Finish Your Table: Choose a stain or paint that matches your decor. Apply it evenly across the table’s surface, following the product instructions. If you’re using stain, make sure to let it dry completely before applying a sealer or polyurethane for durability.
9. Final Touches: After finishing, inspect your table for any imperfections. Touch up areas that might need extra attention. Once satisfied, let it cure completely before placing it in your desired location.
Building your own table can be a fulfilling project that provides you not just with a functional piece of furniture, but also with a sense of accomplishment. Don’t rush the process; enjoy every step. When friends come by and admire your handiwork, you’ll feel proud knowing you created something unique and custom-made just for your space.
Remember to practice safety precautions while handling tools and materials. Ensure to wear safety goggles and follow all safety instructions. Now, grab your tools, unleash your creativity, and get started on building your own table! Happy building!
Choosing the Right Materials for Your DIY Table
Building your own table is a rewarding project that allows you to unleash your creativity and craftsmanship. One of the most critical aspects of creating a stunning table lies in selecting the right materials. The materials you choose will dictate the table’s strength, durability, and overall aesthetic appeal. Here’s a guide to help you make informed decisions when selecting materials for your DIY table.
Types of Wood
Wood is one of the most popular choices for DIY tables due to its versatility and natural beauty. Here’s a look at some commonly used woods:
- Oak: Known for its strength and durability, oak gives a traditional look. It can withstand wears and tears, making it ideal for dining tables.
- Pine: A softer wood that is budget-friendly and easy to work with. Pine offers a rustic charm but is prone to dents and scratches.
- Maple: Stronger than pine, maple is often used for contemporary designs. Its smooth surface makes it perfect for a polished finish.
- Walnut: Renowned for its rich color and grain patterns, walnut creates an elegant and sophisticated table. However, it tends to be on the pricier side.
Choosing the Right Finishes
The finish of your table not only enhances its beauty but also protects the wood from damage. Here are some popular finishing options:
- Polyurethane: This protective finish is resistant to water, heat, and chemicals, ensuring your table lasts a long time. It’s available in both matte and glossy options.
- Stain: Stains allow you to change the wood’s color while still letting the grain show through. Choose a water-based stain for easy cleanup and a quicker drying time.
- Varnish: Varnish provides a hard layer of protection and can be used over stains to enhance the final look. It takes longer to dry but creates a durable finish.
- Natural Oils: If you prefer an eco-friendly option, natural oils like linseed or tung can nourish the wood and enhance its grain. However, this option may require regular reapplications.
Metal Options for Legs and Frames
While wood can be the star of the show, the table’s legs and framing can dramatically affect its style and stability. Consider the following metal options:
- Steel: Strong and durable, steel legs can provide modern aesthetics and exceptional support. Whether galvanized or black, steel can withstand heavy use.
- Aluminum: Lightweight yet sturdy, aluminum is rust-resistant, making it ideal for outdoor tables. It can be easily shaped for contemporary designs.
- Iron: Wrought iron legs can lend vintage charm and elegance to your table. They are heavy-duty, ensuring that your table remains stable and secure.
Considerations for Table Top Material
Besides wood, there are alternative materials you might consider for the tabletop. Some popular choices include:
- Glass: Perfect for modern and minimalist designs, a glass top allows light to flow through and can make your space appear larger.
- Concrete: For an industrial look, concrete can be a perfect choice. Just make sure to use the right sealants, as it can chip easily.
- Laminate: This cost-effective option offers a wide variety of designs and finishes while remaining easy to clean and maintain.
Understanding Your Budget
When you set out to build your own table, having a clear budget is essential. Different materials can vary significantly in cost, so consider the following:
- Quality of Wood: High-quality hardwoods will likely set you back more but can be worth the investment for durability.
- Finishing Products: Invest in good finishes, as they will protect your table and enhance its appearance.
- Tool Rentals/Purchases: Assess what tools you already have and what you may need to rent or buy for the project.
Selecting the right materials is crucial in creating a stylish and functional DIY table. Keep the style, durability, and budget in mind as you decide on the best materials for your project. By carefully considering these factors, you can build a table that not only complements your home but also becomes a cherished centerpiece for years to come.
Essential Tools and Equipment for Table Building
Building your own table can be a rewarding project that adds charm and functionality to your living space. However, to achieve a sturdy and beautiful piece, having the right tools and equipment is essential. Let’s explore the must-have tools that will help you in your table-building journey.
Basic Tools
Before diving into the more specialized tools, make sure you have the basic tools ready. These tools are fundamental and will greatly assist you throughout the building process:
- Measuring Tape: Accurate measurements are crucial. A 25-foot measuring tape is often sufficient for most projects.
- Square: A framing square ensures that your corners are precise and creates a sturdy table frame.
- Level: Use a spirit level to check that your table surface is even, providing stability.
- Pencil: Mark your measurements clearly. A carpenter’s pencil works best as it’s easily visible on wood.
Cutting Tools
Once you have your basics in place, the next critical step is cutting your materials accurately. Here are some tools essential for cutting wood:
- Hand Saw: Ideal for small projects, a hand saw provides control for precise cuts.
- Circular Saw: For larger cuts or thicker wood, a circular saw makes the job quicker and more efficient.
- Miter Saw: This tool allows for angled cuts and provides a clean finish, especially for table legs and frames.
Joining Tools
Joining your wood pieces securely is key to building a long-lasting table. Here are essential joining tools:
- Power Drill: A good cordless power drill will make drilling pilot holes and screwing in fasteners much easier.
- Wood Glue: This is a must-have for any wooden project. It provides strength and stability in your joints.
- Screws and Fasteners: Use wood screws or specific fasteners based on the type of joint you’re working with; this adds to the table’s integrity.
Finishing Tools
To ensure your table not only looks great but also lasts, a proper finishing process is vital. Here are the finishing tools you’ll need:
- Sander: An electric sander will save time, ensuring all surfaces are smooth before applying a finish.
- Paintbrushes or Rollers: For applying paint or stain evenly, high-quality brushes will provide better results.
- Cloths: Use lint-free cloths for applying finishes or cleaning wood surfaces during your project.
Safety Equipment
Safety should always come first. Protect yourself while working with tools and materials by using the following safety equipment:
- Safety Glasses: Protect your eyes from dust and debris.
- Ear Protection: Use earplugs or earmuffs when working with loud tools like saws.
- Dust Mask: Keeping your lungs safe from sawdust and fumes is important when working with power tools.
Having the right tools and equipment is crucial for successfully building your own table. Each tool plays a vital role, from precise measurements and cutting to strong joints and fine finishes. As you prepare your workspace and gather these essentials, remember that safety is just as important to ensure a smooth and enjoyable building experience. With the right tools in hand, you’re ready to bring your table-building project to life!
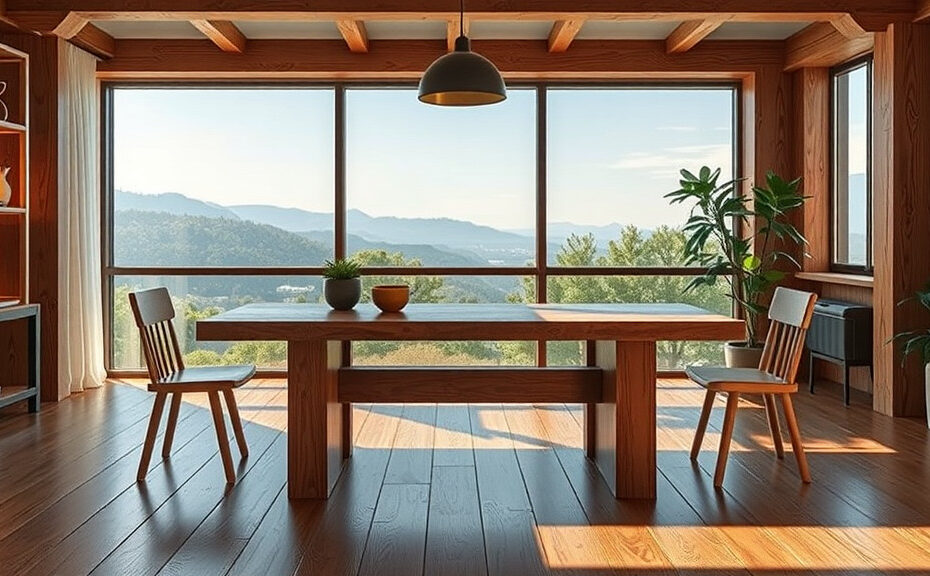
Design Ideas to Personalize Your Custom Table
When it comes to customizing your own table, you can express your personal style and create a piece that truly fits your space. Whether you need a dining table, coffee table, or a desk, there are countless design ideas to help you personalize your creation. Let’s explore various ways to add your unique touch to your custom table.
Choosing the Right Shape
The first step to personalize your table is deciding on its shape. Different shapes can dramatically affect the overall feel of your space:
- Rectangular: Perfect for larger dining rooms, offering ample seating and versatility.
- Round: Creates an intimate atmosphere, ideal for smaller gatherings.
- Square: Efficient for compact spaces, suitable for small families or duos.
- Custom Shapes: Don’t be afraid to think outside the box! Irregular shapes can provide a unique focal point.
Material Selection
What your table is made of can profoundly impact its appearance and the style of your room. Here are some popular materials to consider:
- Wood: Brings warmth and creates a classic look. You can choose from oak, maple, or reclaimed wood for extra character.
- Metal: Ideal for modern and industrial aesthetics. Steel or aluminum can provide a sleek and sturdy option.
- Glass: Offers a contemporary feel and can make a space feel larger. It pairs well with various base materials.
- Composite Materials: Combinations like plywood or MDF offer eco-friendly alternatives with endless design options.
Color and Finish
The finish on your table can significantly alter its look. Consider these aspects:
- Stain: Enhance the natural beauty of the wood grain with different stain colors.
- Paint: For a pop of color, choose vibrant shades that reflect your personality.
- Natural Finish: Maintain the natural look with a clear finish that protects the wood while showcasing its grain.
Add Unique Features
Customization doesn’t stop at shape and material. Here are some features you can incorporate:
- Inlays: Introduce patterns or designs within the table’s surface using contrasting woods or stones.
- Storage Solutions: Incorporate drawers or shelves to enhance functionality.
- Table Legs: Design unique legs that match your style. Consider options like angled legs, tapered styles, or even bold furniture feet.
- Lighting: For a dramatic flair, consider integrating LED lights into your design or placing a spotlight above the table.
Accessorizing Your Table
Once your table is built, accessorizing can elevate its aesthetic. Here are some suggestions:
- Tableware: Use unique plates, glasses, and utensils for dining tables to showcase your style.
- Tablecloths and Runners: These allow you to play with colors and patterns during different occasions.
- Candles and Centerpieces: Create a stunning focal point by incorporating flowers, candles, or themed decorations.
- Art Pieces: Place small sculptures or decorative items on your table to make a statement.
Consider Your Space
The design of your table should also consider its environment. Think about factors such as:
- Sizing: Ensure your table fits comfortably within the available space.
- Style Compatibility: Match the table’s design with your existing decor for a cohesive look.
- Light Conditions: Consider how natural light affects the color and feel of your table.
There are endless possibilities when it comes to personalizing your custom table. From the shape and material to the smaller details and accessories, you have the power to create a piece that reflects your individuality and meets your functional needs. Enjoy the process and let your creativity shine!
Common Mistakes to Avoid When Building Your Own Table
Building your own table can be a rewarding project, allowing you to create something unique for your home. However, it’s easy to make mistakes along the way, which can lead to frustration and wasted materials. Here are some common pitfalls to avoid to ensure your DIY table is a success.
Neglecting to Plan Thoroughly
When embarking on a table-building project, having a solid plan is essential. Skipping this step can lead to confusion and errors. Begin by sketching your design and listing all materials you will need. Consider measurements carefully to ensure your table fits perfectly in the intended space.
Choosing the Wrong Materials
Selecting the right materials is crucial for the durability and appearance of your table. Many beginners might opt for lower-quality wood to save money, but this can result in a flimsy structure. Be sure to choose hardwood or high-quality plywood that meets your needs. Understand the characteristics of different types of wood, such as oak for sturdiness or pine for a lighter design.
Ignoring Proper Tools
Using inadequate tools can greatly hinder your project. You don’t need an elaborate workshop, but having basic tools like a saw, drill, and level is important. Ensure your tools are in good condition and that you’re familiar with how to use them. This will streamline the building process and improve your results.
Inaccurate Measurements
One of the most frequent mistakes is not measuring accurately. Always double-check your measurements before cutting. An error of just a little can lead to significant problems down the line. Use a tape measure and a square to mark your points clearly. Remember the old saying: “Measure twice, cut once.”
Forgetting to Sand and Finish
After assembling your table, some might be eager to use it immediately. However, skipping the sanding and finishing process can lead to a rough surface and splinters. Smooth out all edges and surfaces with sandpaper and apply a finish to protect the wood and enhance its appearance. This step is critical for both aesthetics and durability.
Overlooking Stability
A beautiful table is not worth much if it wobbles. Ensure that you are assembling your table in a way that promotes stability. Use proper joints and reinforce corners with brackets or wood glue. If your table has legs, confirm they are evenly spaced and securely attached. Test the stability before finishing your project to avoid having a wobbly table.
Disregarding Style and Scale
It’s essential that your table complements your home’s style. When planning, consider the existing decor and choose a design and finish that harmonizes with your space. Additionally, ensure your table is proportionate to your room and fits the intended use, whether for dining or as a workspace.
Not Considering Maintenance
Building your own table means you should also think about its upkeep. Depending on the material and finish, some tables may require more maintenance than others. Choose a finish that suits your lifestyle; for instance, if you have young children, a stain-resistant finish may be a wise choice.
Skipping Testing and Adjustments
After building your table, it’s important to test its functionality. Place items on the table to see how it holds up under weight. If any issues arise, make adjustments before applying the final touches. This is also the time to see if the height is comfortable for sitting or working at.
Disregarding Safety Precautions
Safety should always be a priority when working with power tools. Always wear protective gear, such as goggles and gloves. Take your time, and don’t rush through the project.
By steering clear of these common mistakes, you’ll be well on your way to successfully building your own table. Remember that patience and attention to detail are key to creating a piece you can be proud of. Each step, from planning to finishing, contributes to the final product, so don’t overlook any of them!
With careful preparation and consideration of these tips, you’ll not only avoid mishaps but also enjoy the process of crafting your very own table. A well-built table can bring joy to your home for years to come, making the effort worth it.
Conclusion
Building your own table can be a rewarding and fulfilling project that enhances your space while reflecting your personal style. By following a step-by-step guide, you can navigate the process with ease, ensuring you have a solid plan from the beginning. Choosing the right materials is crucial, as it impacts not only the durability of your table but also its overall aesthetic. Whether you opt for sturdy hardwoods, sleek metal, or reclaimed materials, the choices you make will define your table’s character.
Having the essential tools and equipment on hand makes the building process smoother and more efficient. It’s important to familiarize yourself with each tool, as understanding how to use them correctly will enhance the quality of your work. When it comes to design, don’t hesitate to get creative! Personalizing your table with unique features like custom legs, finishes, or patterns can set your project apart, making it truly one-of-a-kind.
As you embark on this journey, be mindful of common mistakes many DIY builders encounter. From measuring inaccurately to rushing through assembly, avoiding these pitfalls will save you time and frustration. With patience and attention to detail, you can create a table that meets your needs and showcases your creativity.
Ultimately, building your own table is more than just a craft—it’s an opportunity to bring functionality and beauty into your home while gaining a sense of accomplishment with each step. Embrace the experience, learn from the process, and enjoy the satisfaction that comes from creating a piece of furniture that you can treasure for years to come.