Constructing Your Own Wood Storage Rack: Step-by-Step Guide
Building a wood storage rack can be a rewarding and practical project for anyone looking to organize their workspace or garage. With the right materials and an understanding of the steps involved, you can construct a sturdy and efficient rack to store your wood. Here’s a comprehensive guide to help you get started.
Materials You Will Need
- 2×4-inch lumber for the frame
- 1×4-inch lumber for the shelves
- Wood screws (3-inch and 1.5-inch)
- Wood glue (optional)
- A saw (circular or miter saw)
- Drill with drill bits
- Measuring tape
- Square or level
- Sanding block or sander
- Wood finish or sealant (optional)
Step-by-Step Construction
Step 1: Planning Your Rack
Before you start cutting any wood, plan your wood storage rack’s design. Think about how much wood you need to store and the available space. A common size for a simple wood storage rack is about 3 to 4 feet wide, 6 to 7 feet tall, and 2 feet deep. However, you can adjust these dimensions according to your needs.
Step 2: Measuring and Cutting
Once you have your design, measure your lumber carefully. You’ll need pieces for the vertical supports, horizontal shelves, and cross supports. Here’s a basic list of what you’ll need to cut:
- 4 vertical supports: 6 feet long
- 6 horizontal shelves: 4 feet long
- 4 cross supports: 3 feet long (optional for extra stability)
Using your saw, cut the lumber according to your measurements. Always wear protective gear when cutting wood to ensure safety.
Step 3: Assembling the Frame
Start assembling the frame by laying out the vertical supports. Attach the horizontal shelves to the vertical pieces using wood screws. Here’s how:
- Position two vertical supports upright and parallel to each other.
- Attach the first shelf at the desired height, ensuring it’s level.
- Secure the shelf with 3-inch screws and wood glue if desired.
- Repeat this for the remaining shelves, spacing them evenly.
If you choose to add cross supports, position them in the middle of the vertical supports for added strength.
Step 4: Adding Shelves
Once the frame is complete, attach the 1×4-inch lumber pieces as shelves. You can use 1.5-inch screws to secure them to the horizontal supports. Make sure each shelf is level and firmly attached, as this will hold all of your wood.
Step 5: Sanding and Finishing
After assembling the rack, take some time to smooth out any rough edges with a sanding block or sander. Sanding will not only make your rack look better but also prevent any splinters from forming.
If you prefer, apply a wood finish or sealant for extra protection against moisture and wear.
Step 6: Installation and Organization
Position your wood storage rack in your workspace or garage. Use a level to ensure it stands straight. Once in place, you can start organizing your wood. Stack similar-sized pieces together, and keep frequently used boards at eye level for easy access. Consider using bins or holders for smaller scraps.
Tips for Maintenance
After your rack is set up, remember these maintenance tips:
- Periodically check for loose screws and tighten them as necessary.
- Keep the rack clean and free of debris.
- Store wood properly, allowing for air circulation to prevent warping.
By following these steps, you’ll have a highly functional wood storage rack that meets your needs. Enjoy the benefits of a tidier workspace and easy access to your wood supply. Happy building!
Essential Tools and Materials for Building a Wood Storage Rack
Building a wood storage rack requires careful planning and the right tools and materials to ensure a sturdy, functional, and visually appealing result. If you’re looking to organize your garage, workshop, or shed, knowing what to gather before diving into the project is essential. Here’s a detailed breakdown of the essential tools and materials you’ll need for constructing a wood storage rack.
Tools You’ll Need
- Measuring Tape: Accurate measurements are crucial in woodworking. A good measuring tape will help you determine the length and width of your wood storage rack.
- Power Drill: This tool will be essential for drilling holes and driving screws. A cordless power drill adds convenience, allowing mobility without being tethered to a power outlet.
- Saw: Depending on the height and design of your rack, you can choose between a circular saw for straight cuts or a miter saw for more precise angles.
- Level: To ensure that your wood storage rack is perfectly horizontal, a level prevents items from falling over.
- Chisel Set: While not always necessary, having a chisel set might help in making fine adjustments to your wood joints.
- Screwdriver Set: You’ll need various sizes of screwdrivers to secure the brackets and other components of your storage rack.
- Clamps: Clamps are essential for holding pieces together while you drill or glue them. They provide stability, ensuring that your wood doesn’t shift during assembly.
- Sandpaper: Smooth out edges and surfaces using sandpaper to prevent splinters and improve the overall finish of your rack.
Materials Required
Gathering the right materials will not only facilitate the building process but also determine the durability and look of your wood storage rack. Here’s what you should consider:
- Wood: The primary material for your rack is wood. Select sturdy lumber like pine, oak, or plywood. The type of wood will depend on your budget and the aesthetic you’re going for. Remember to purchase boards in the sizes dictated by your design.
- Brackets: Depending on your design, you may need metal or wooden brackets to support the shelves. Heavy-duty brackets are advisable if you plan to store heavier wood pieces.
- Screws: Be sure to use wood screws appropriate for the thickness of your lumber. These will provide the strength needed to hold your rack together securely.
- Wood Glue: For added stability, consider using wood glue along with screws. This helps create a stronger bond between the pieces.
- Finish: If you want your storage rack to look polished, consider using wood stain or sealant. Paint may also be an option if you prefer a colored finish.
- Rubber pads: To prevent the rack from scratching your floor and to add stability, consider placing rubber pads on the base of your storage rack. They can also prevent the rack from slipping, especially if you store it on a slick surface.
Preparation Steps
Once you have your tools and materials ready, it’s time to prepare to build your wood storage rack:
- Design Your Rack: Take time to sketch out your design. Consider how much wood you need to store and what dimensions will fit your space.
- Measure and Cut: Measure the wood according to your design and cut the pieces accurately. It’s better to cut twice and measure once.
- Layout Your Pieces: Before assembly, lay out all pieces to visualize how they will fit together. This step can help identify any adjustments needed before you start securing components.
- Assembly: Begin assembling the rack in sections, making sure to use a level to keep everything straight.
Constructing a wood storage rack can be a rewarding project that enhances the organization of your workspace. By preparing with the right tools and materials, you’ll set yourself up for success.
Creative Designs for Maximizing Wood Storage Space
When you have a lot of wood to store, making the most of your space can be a challenge. Creative designs can help you optimize your wood storage area while keeping it organized and accessible. Here are some innovative ideas to consider when planning your wood storage solutions.
Vertical Wood Storage
Utilizing vertical space is essential for maximizing storage. Vertical wood storage racks help you take advantage of wall height, freeing up valuable floor space. Here’s how to design one:
- Wall-Mounted Racks: Create a sturdy wall-mounted rack using plywood or metal brackets. This design can hold various sizes of lumber and keeps materials off the ground.
- Slotted Vertical Storage: Consider a vertical storage unit with slots for each piece of wood. This way, you can easily grab what you need without pulling everything out.
Multi-Purpose Furniture
In smaller spaces, incorporating multi-purpose furniture can be a game-changer. Here are a few suggestions:
- Bench with Storage: Build a bench that can double as a storage area for your wood. This not only provides seating but also retains usefulness.
- Coffee Table with Hidden Compartments: Design a coffee table with drawers or compartments underneath to store short wood pieces, keeping your space tidy.
Rolling Storage Carts
Another smart approach is to use rolling storage carts. These carts are versatile and can easily be moved from one location to another. For an efficient design:
- Open Shelving: Create an open-shelf cart for easy access to various sizes of wood. Open shelving allows for quicker identification of materials.
- Divided Sections: Add dividers within the cart to keep different types of wood organized. This will save time when you’re searching for a specific piece.
Under-Bench Storage
Use the space beneath benches or worktables wisely. Ensure you have a system in place for proper wood storage:
- Sliding Bins: Build sliding bins that fit under existing furniture. This design keeps your wood out of sight while still being easily accessible.
- Pull-Out Drawers: Consider adding pull-out drawers under your workbench. These drawers can accommodate shorter pieces of wood and keep everything organized.
Hanging Storage Solutions
Hanging storage is another fantastic way to keep wood organized. Here are some designs that work well:
- Ceiling Hooks: Install hooks in the ceiling to hang long pieces of lumber. Make sure the hooks are securely attached to prevent any accidents.
- Pegboards: Use pegboards on walls to hang tools and small pieces of wood. This keeps everything visible and easy to reach.
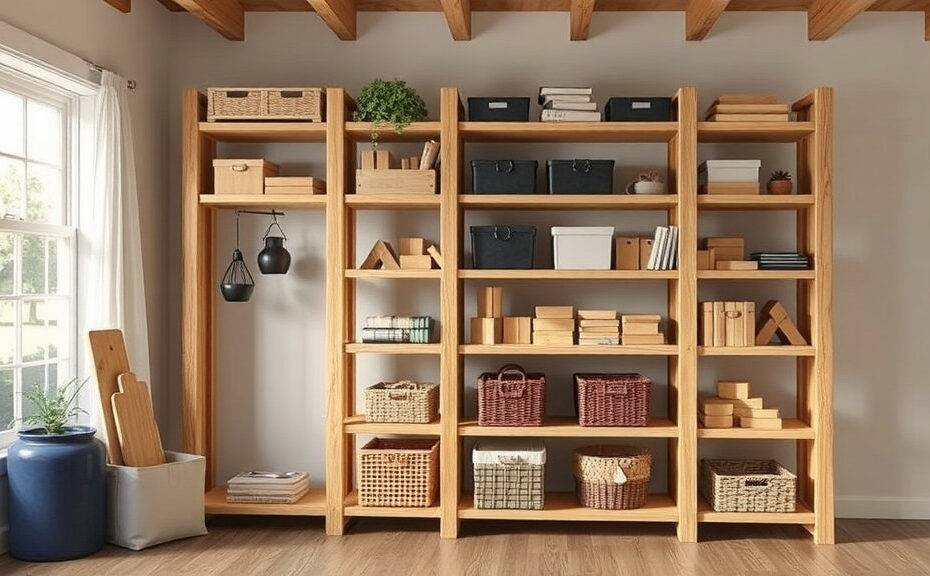
Custom Shelving Units
If space and budget allow, building a custom shelving unit specifically for wood storage could be the best solution. Consider the following:
- Adjustable Shelves: Create adjustable shelving units to accommodate various sizes of lumber and adjust as needed.
- Labeling System: Use a labeling system for each shelf to quickly identify what type of wood is stored where. This can save time and frustration.
Outdoor Storage Solutions
If you have the space outdoors, consider building a wood shed or covered area:
- Wood Sheds: A dedicated wood shed can protect your materials from the elements while keeping your workspace organized.
- Covered Racks: Simple covered racks can keep wood dry and readily available for use, especially in inclement weather.
By implementing these creative designs, you can significantly maximize your wood storage space. Evaluate your specific needs and available space to choose the best options for you. Investing time in planning your wood storage will lead to more accessible and organized materials in the long run.
Common Mistakes to Avoid When Building a Wood Storage Rack
Building a wood storage rack can be a rewarding project, but it’s easy to make mistakes that can lead to regrets down the road. Awareness of common pitfalls can help ensure your wood storage rack is both functional and durable. Here are some essential mistakes to avoid that will improve your wood storage experience.
Choosing the Wrong Location
One of the most significant errors is not considering the location before you start building. You want to place your wood storage rack somewhere that’s easily accessible yet out of the way of foot traffic. Think about factors like:
- Space for movement around the rack
- Proximity to your workspace
- Protection from the elements
By selecting an appropriate location, you can optimize your workflow and keep your materials safe.
Using Inadequate Materials
Another common mistake is skimping on materials. Instead of using cheap or flimsy wood, opt for sturdy lumber that can withstand the weight of the wood you plan to store. Here are some materials to consider:
- Pressure-treated lumber for outdoor use
- Hardwood or plywood for indoor racks
- Metal brackets for added support
Investing in quality materials from the start will save you time and money in the long run.
Improper Measurements
Accurate measurements are crucial in building a wood storage rack. Many people make the mistake of guesstimating dimensions, leading to a poorly fitting rack. Follow these steps to ensure your measurements are precise:
- Use a tape measure for precise dimensions
- Double-check all measurements before cutting
- Plan for the dimensions of the wood you intend to store
A little careful planning can prevent a lot of frustration later.
Neglecting Weight Capacity
When building a wood storage rack, it’s easy to overlook weight capacity. Heavy planks can easily cause a rack to sag or even collapse if not adequately supported. Here’s what you should keep in mind:
- For lightweight materials, spacing between shelves can be greater.
- For heavier planks, consider adding additional support beams.
- Test the load capacity with your heaviest planks before filling the rack completely.
By factoring in weight capacity, your storage rack can provide a safe and sturdy solution.
Not Preparing for Future Needs
One essential tip often ignored is preparing for future expansion. If you plan to acquire more lumber or larger pieces, ensure your design can adapt. Consider the following:
- Design a modular rack that can be expanded when needed.
- Leave extra space between levels to accommodate larger items.
- Think about add-ons, like additional shelves that can be easily fastened.
Being forward-thinking can make your storage solution far more versatile.
Skipping the Finishing Touches
Many people rush through the project and forget to finish their rack properly. Finishing touches are essential for longevity and usability. Important items to address include:
- Sanding all surfaces to avoid splinters
- Applying a weatherproof sealant for outdoor storage
- Labeling sections to help keep your lumber organized
A little attention to detail in the end can improve the overall efficiency of your storage system.
Forgetting Accessibility
Accessibility is often overlooked in the design phase. A wood storage rack should provide easy access to your materials. Consider the following:
- Choose a design that allows you to retrieve wood easily.
- Height should cater to your own reach—avoid placing heavy items too high.
- Consider the flow of your workspace to maintain efficiency.
Ensuring accessibility will make working on projects smoother and more enjoyable.
Avoiding these common mistakes when building a wood storage rack can lead to a functional and long-lasting solution for all your woodworking needs. Keep these tips in mind, and you’ll be well on your way to a successful project!
Maintenance Tips for Keeping Your Wood Storage Rack in Top Shape
Keeping your wood storage rack in top shape is essential for maintaining its functionality and appearance. Regular maintenance not only extends the life of the rack but also ensures that it can safely hold your materials without any risk of damage. Below are some effective tips to help you care for your wood storage rack, ensuring it remains sturdy and attractive.
1. Regular Cleaning
One of the simplest ways to maintain your wood storage rack is through regular cleaning. Dust and debris can accumulate over time, leading to stains or even mold growth. Here’s how to properly clean your rack:
- Use a Soft Cloth: Wipe down the surfaces with a dry or slightly damp soft cloth. Avoid abrasive materials that can scratch the wood.
- Natural Cleaners: If there are stubborn stains, consider using a mixture of water and vinegar for a natural cleaner. Test it on a small area first to ensure it doesn’t affect the finish.
- Avoid Excess Water: Wood can warp if it gets too wet, so always dry any damp areas promptly.
2. Inspect for Damage
Regular inspections can help catch issues before they become significant problems. Look for:
- Cracks or Splits: Check for any cracks in the wood. If you find them, use wood glue to secure the area or consider replacing the damaged piece if necessary.
- Loose Joints: Tighten any screws or bolts holding your rack together. This keeps the structure sturdy and reduces the risk of collapse.
- Signs of Rot: Inspect for any signs of rot, especially if your wooden rack is kept outdoors or in damp areas. Treat the affected area with wood preservative to prevent further damage.
3. Maintain the Finish
The finish on your wood storage rack not only enhances its appearance but also protects it from moisture and wear. Here’s how to keep that finish looking new:
- Reapply Wood Oil or Finish: Depending on the type of finish, you may need to reapply it every few months. Use a quality wood oil or varnish.
- Avoid Direct Sunlight: If your rack is near a window or in direct sunlight, consider repositioning it to prevent fading or drying out.
4. Protect from Moisture
Moisture can be the enemy of wood, leading to mold or rot. Ensure your storage rack is protected:
- Use a Dehumidifier: If your storage area is particularly humid, consider using a dehumidifier to circulate air and reduce moisture levels.
- Store Properly: Place items on the rack in a way that promotes air circulation, keeping them away from direct contact with the wood if possible.
5. Check Load Capacity
Overloading your wood storage rack can lead to structural damage. Follow these guidelines to avoid issues:
- Know Your Limits: Understand the weight capacity of your rack and ensure you never exceed it.
- Distribute Weight Evenly: When storing items, distribute weight evenly across the rack to maintain balance and stability.
6. Seasonal Maintenance
Seasonal changes can affect the wood in your storage rack. Take some steps to prepare for different seasons:
- Spring Cleaning: After winter, do a thorough inspection and cleaning. This is also a great time to apply a fresh coat of wood finish.
- Winter Protection: If your rack is outside, ensure it is properly sealed before winter to protect it from moisture and ice.
7. Repair Promptly
If you discover any issues during your inspections, be proactive about repairs. Addressing problems quickly can save you from costly replacements. If you notice any loose screws, frayed edges, or rot, fix them as soon as possible to keep your wood storage rack safe and sturdy.
By following these maintenance tips, you can ensure that your wood storage rack stays in excellent condition for years to come. Not only will it serve as a functional storage solution, but it will also maintain its beautiful appearance, showcasing your care and attention to quality.
Conclusion
Building a wood storage rack is a rewarding project that can enhance your workshop or garage while keeping your wood organized and easily accessible. By following the step-by-step guide outlined earlier, you can construct a durable rack tailored to your specific needs. Remember that having the right tools and materials is crucial to ensure a smooth building process. Investing in quality materials will not only add longevity to your rack but also enhance its appearance.
Creativity can play a significant role in maximizing your wood storage space. By exploring different designs, you can find solutions that fit your available area and your wood storage requirements. This can mean incorporating vertical storage or modular designs for more flexibility.
Being aware of common mistakes can save you time, money, and frustration. Simple oversights, such as not factoring in weight limits or underestimating the space needed, can lead to problems down the line. Consulting design guides and planning carefully can prevent these issues.
Maintenance is key to keeping your wood storage rack functional and attractive for years to come. Regular checks for wear and tear, ensuring that it is free from moisture, and cleaning it periodically will extend its life and usability.
By applying these insights and strategies, you can build a wood storage rack that not only meets your current needs but adapts over time. Enjoy the process of creating a custom solution, and take pride in the finished product that will serve you well for many projects ahead.