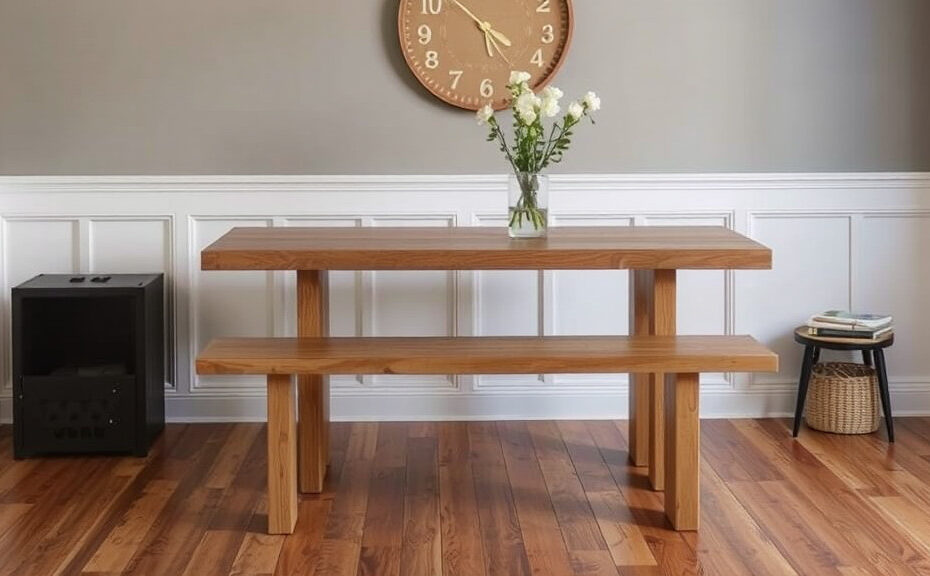
Step-by-Step Guide on How to Build a Dining Bench
Building a dining bench is a fantastic way to enhance your home with both functionality and style. It serves as a great focal point in your dining area, providing extra seating while being a fun DIY project. Follow this step-by-step guide to create your own dining bench, complete with all the necessary materials, tools, and tips for crafting a beautiful piece that fits perfectly in your home.
Gather the Materials
Before you begin building, ensure you have all the materials ready. Below is a list of items you will need:
- Wood boards (for the top and legs)
- Wood screws
- Wood glue
- Sandpaper
- Wood stain or paint
- Paintbrush or roller
- Clamps
- Drill
- Measuring tape
- Square
- Safety goggles
- Saw (hand saw or power saw)
Decide on Dimensions
Before cutting any wood, determine the size of your bench. A standard dining bench is usually about 48 to 60 inches long, 15 to 20 inches deep, and about 18 inches high. These measurements can vary based on your space and style preferences, so take your time to decide what works best for you.
Cut the Wood
Using your measuring tape and square, mark where you will cut the wood. Here’s how to approach this step:
- Cut the wood for the tabletop. You’ll need one long board to act as the top of your dining bench.
- Next, cut the legs. You will typically need four legs, each cut to about 18 inches in height.
- If you want, you can also create supports that run underneath the tabletop to ensure stability. These can be two smaller boards cut to fit between the legs.
Assemble the Frame
Once you have your pieces cut, it’s time to assemble your bench frame:
- Take the four legs and attach the supports using wood screws and wood glue to form a rectangular frame. Make sure the screws are tightened properly, and check that everything is square.
- Attach the legs to each corner of the frame, ensuring that they are secured tightly. You can use clamps to hold them together while the glue dries.
Attach the Top
Now that the frame is assembled, you can attach the top:
- Position the tabletop on top of the frame. Make sure it is centered and that there is even overhang on each side.
- Using wood screws, attach the tabletop to the frame through the supports underneath. Aim for at least 4 screws to ensure it is securely attached.
Sand the Surface
Now that everything is in place, it’s time for sanding:
- Use sandpaper to smooth out any rough edges on the bench. Pay special attention to the corners and edges.
- Be careful while sanding to avoid creating deep scratches in the wood.
Finish the Bench
To protect the wood and enhance its appearance, apply a finish:
- Choose a wood stain or paint that matches your decor.
- Apply evenly with a paintbrush or roller, and don’t forget the underneath areas.
- Allow the finish to dry completely before moving the bench to its final location.
Final Touches
Once the finish has dried, you can add cushions or decorative throws to your new dining bench. These additions not only improve comfort but also elevate the overall design of your dining area.
By following these steps, you can successfully build a dining bench that is not only sturdy but also a beautiful addition to your home. This project can also be customized to fit your unique style, color, and size preferences. Enjoy your new bench and the cozy atmosphere it creates during meals with family and friends!
Essential Tools and Materials Needed for Building a Dining Bench
When you’re ready to build a dining bench, gathering the right tools and materials is essential for a successful project. This guide will help you understand what you need, so you can enjoy the process and create a beautiful bench for your dining area.
Essential Tools for Building a Dining Bench
Having the right tools at your fingertips will make building a dining bench a smoother experience. Here’s a list of essential tools you’ll need:
- Measuring Tape: Accuracy is key when measuring lengths and widths. A 25-foot tape measure is generally ideal for most projects.
- Level: Ensure your bench is even and won’t wobble. A 2-foot level works well for smaller projects.
- Square: This tool helps you check the right angles, ensuring your cuts are perfect and your bench is sturdy.
- Circular Saw: A circular saw is ideal for making straight cuts in wood. If you choose a compound miter saw, it can also help with angled cuts.
- Drill: A cordless drill is crucial for drilling pilot holes and driving screws into your dining bench’s components.
- Screwdriver: Even with a drill, having a standard screwdriver for finishing touches and adjustments can be useful.
- Sander: A power sander can save time and give your dining bench a smooth finish, but hand sanding might be necessary for small details.
- Clamps: These are essential for holding pieces in place as the glue sets or during assembly.
Materials Needed
The materials you choose for your dining bench can greatly affect its durability and appearance. Below are the primary materials you should gather:
- Wood: Select wood based on your aesthetic preference and budget. Common choices include:
- Pine: Affordable and easy to work with.
- Oak: Strong and durable, it adds a classic look.
- Birch: Provides a smooth surface with a light color.
- Screws: Choose wood screws that are at least 1.5 inches long for sturdy joints.
- Wood Glue: This will help reinforce the joints between pieces of wood for added stability.
- Finish: Apply paint, stain, or sealant to protect the wood and enhance the appearance. Make sure to choose a finish that’s safe for furniture.
- Legs (Optional): If you opt for pre-made legs, ensure they are compatible with your bench’s dimensions and style.
Safety Gear
Your safety during the building process is paramount. Be sure to include the following safety gear:
- Safety Glasses: Protect your eyes from dust and debris.
- Dust Mask: Keep inhaling dust to a minimum when sanding or cutting.
- Earmuffs or Earplugs: Protect your hearing when using power tools.
Assembly Tips
Once you have all your tools and materials ready, it’s time to start assembling your dining bench. Here are some tips to keep in mind:
- Double-check your measurements before cutting to minimize waste.
- Clean the edges of the wood after cutting to make assembly smoother.
- Use clamps to hold pieces in place while the glue dries, ensuring precision in your construction.
Building a dining bench can be a rewarding task, especially when you gather the correct tools and materials beforehand. With these essentials in hand, you’ll be able to create a beautiful and functional piece that enhances your dining experience. Enjoy the process of crafting your dining bench and take pride in the final product!
Creative Design Ideas for Your Dining Bench
When you think about creating a welcoming atmosphere in your dining area, your choice of seating is crucial. A dining bench can add character and style to your space. Here are some creative design ideas that can help you decide on what type of dining bench fits your needs and enhances your home decor.
Maximize Space with a Built-In Bench
If you have limited space, consider a built-in dining bench. This is a great way to utilize corners effectively. A built-in bench can also be customized to match your kitchen or dining room decor. Select materials that complement your existing furniture to create a seamless look. Don’t forget to add cushions or pillows for comfort!
Mix and Match Materials
Combining different materials can bring a unique vibe to your dining area. Here are some combinations to consider:
- Wood and Metal: A wooden bench with metal legs can add an industrial charm.
- Upholstered and Wood: An upholstered top on a wooden frame offers both comfort and style.
- Recycled Materials: Creating a bench from reclaimed wood or metal can add an eco-friendly flair.
Utilize Color and Pattern
Don’t shy away from color! A bold hue can make your bench a statement piece. Here’s how to incorporate color:
- Paint It Bright: A vibrant color can make your dining bench a focal point.
- Patterns and Textures: Use patterned fabric for cushions or a textured finish on the bench itself.
- Stain for Effect: A dark stain can add elegance, while a lighter stain can create a beachy feel.
Incorporate Storage
Storage benches are perfect for keeping your dining area neat. Here are some functional ideas:
- Built-In Storage: Design a bench with compartments underneath for easy storage of dining essentials.
- Ottoman Style: Use an ottoman-style bench that opens to reveal storage space inside.
- Shelves or Baskets: Place baskets or shelves beneath the bench for a stylish storage solution.
Personalize with Accessories
Adding personal touches can make your dining bench feel special. Consider these decorative options:
- Pillows: Use decorative pillows that match or contrast with your dining decor for comfort.
- Table Runners: A table runner can tie the bench together with your dining table.
- Artwork: Position wall art near the bench to create a cohesive look.
Reclaimed and Upcycled Designs
For those who value sustainability, consider building a bench from reclaimed materials. This not only saves money but also adds a unique history to your decor. Here are some ideas:
- Old Doors: Repurpose an old door as a bench top for a rustic feel.
- Wine Crates: Stack wine crates to create a fun and functional design.
- Pallets: Wooden pallets can easily be transformed into a trendy, farmhouse-style bench.
Adjustable or Movable Benches
A movable or adjustable bench can be beneficial for larger gatherings. Look for designs that allow for flexibility in arrangement. Consider these types:
- Bench on Casters: Install wheels on the bottom for easy movement.
- Expandable Benches: Create a bench that can be lengthened or shortened as needed.
Ultimately, a dining bench is not just a seat; it can enhance your dining experience. By implementing these creative design ideas, you can create a bench that fits your aesthetic and practical needs, making every meal a little more special.
Maintenance Tips for Keeping Your Dining Bench in Top Shape
Your dining bench is a key piece of furniture in your home, providing a cozy spot for meals, gatherings, and relaxation. To ensure it remains a staple in your dining space for years to come, maintenance is essential. Here are several effective tips that you can easily implement to keep your dining bench looking great.
Regular Cleaning
Cleaning is the first step in maintenance. Dust and dirt can accumulate quickly, affecting not only appearance but also durability. Follow these steps for regular cleaning:
- Weekly Dusting: Use a soft, lint-free cloth to dust your bench weekly. This prevents dirt buildup.
- Spill Management: Clean spills immediately to avoid stains. A damp cloth with mild soap is usually enough.
- Avoid Harsh Chemicals: Stay away from strong cleaners that can damage the finish of your bench. Opt for natural solutions whenever possible.
Conditioning the Surface
If your dining bench is made of wood, it’s essential to maintain its finish. Using a suitable wood conditioner can greatly extend its life.
- Frequency: Apply conditioner every 6-12 months, but you may need to do this more often if the bench sees heavy use.
- How to Apply: Use a clean cloth to apply the conditioner evenly, and let it sit for a few minutes before buffing with a dry cloth.
- Choosing the Right Condition: Ensure you use a product that matches the finish (e.g., oil, varnish) of your bench.
Inspecting for Damage
Regularly inspect your dining bench for any signs of wear or damage. Early detection can save you from costly repairs later.
- Screws and Joints: Check all screws and joints every few months. Tighten any loose screws to maintain stability.
- Check for Cracks: Look for cracks in the wood or metal. Small cracks can often be sanded down or filled, but larger issues may require professional repair.
- Upholstery Inspection: If your bench has cushions, inspect the fabric for wear and tear. Consider reupholstering if it becomes frayed or stained.
Protecting from External Factors
Your bench can be affected by external factors like sunlight, humidity, and temperature changes. Protecting it is vital for longevity.
- Avoid Direct Sunlight: Place your bench in a location that does not receive direct sunlight to prevent fading.
- Control Humidity: Keep the room’s humidity levels stable. Excess moisture can warp wood, while extreme dryness can cause it to crack.
- Use Coasters: If your bench is used for meals, always use coasters for drinks. This protects the surface from rings and heat.
Innovative Touch-Ups
For minor scratches and blemishes, you don’t always need to refinish your entire bench. Here are some quick touch-up methods:
- Wood Stain Pens: These can effectively cover up small scratches. Choose a color that matches your bench.
- Furniture Wax: Wax can rejuvenate faded areas and protect against future damage. Simply apply with a soft cloth.
- For Upholstered Benches: Use upholstery cleaner and a brush to maintain fabric cleanliness and remove dust.
Seasonal Checks
Every season brings unique challenges that may require your attention. Schedule seasonal maintenance checks to ensure your dining bench remains in top shape.
- Spring Cleaning: Conduct a thorough clean and check for any winter damage. Spring is an excellent time to refresh your bench.
- Summer Sun Protection: Ensure your bench is shielded from damaging UV rays. Consider using furniture covers when not in use.
- Fall Preparation: As the air gets cooler, take time to inspect for any weather-related wear and treat accordingly.
- Winter Care: Protect against moisture from snowy boots by using a mat where the bench is placed.
By following these simple, yet effective tips, you’ll ensure that your dining bench remains a beautiful and functional piece of your home for years to come. Proper care not only enhances its aesthetic appeal but also leads to long-term durability. Enjoy your dining space and the memories it creates!
Choosing the Right Location for Your Dining Bench in Your Home
When it comes to enhancing your dining space, choosing the right location for your dining bench is crucial. A well-placed bench serves as a practical seating solution and can also elevate the overall design of your home. Here are some essential points to consider that will help you decide where to position your dining bench.
Assess Your Space
Before you decide on a location, take a good look at your dining area and surrounding spaces. Here’s how to assess your space:
- Room Size: Consider the size of your dining room. A large space can accommodate a more significant bench, while a smaller area might need a compact design.
- Flow of Movement: Ensure that the bench doesn’t obstruct foot traffic. People should be able to move around easily without bumping into furniture.
- Proximity to Other Furniture: Think about how the bench will relate to other furniture pieces. Position it near the dining table for shared meals but far enough away to allow for comfortable seating.
Consider Functionality
Your dining bench should primarily meet your practical needs. Ask yourself what you intend to use the bench for:
- Everyday Eating: If you plan to use the bench daily, placing it directly at your dining table is a logical choice.
- Gatherings: For social occasions or family gatherings, consider a location where it can accommodate more people without crowding.
- Multi-Use Spaces: If your dining area also serves as a living space, position the bench where it can easily transition from dining to relaxing.
Take Lighting into Account
The right lighting can improve the atmosphere where the bench is located. Here’s how to enhance your space with proper lighting:
- Natural Light: Position your bench near windows to take advantage of daylight. This will create a bright, inviting space.
- Artificial Light: If your bench is in a dim area, consider adding light fixtures. Pendant lights above the table can create a cozy ambiance.
- Adjustable Lighting: Use dimmers or adjustable lamps to change the mood based on the time of day or the occasion.
Think About Aesthetic Appeal
The location of your dining bench can significantly contribute to the visual appeal of your dining area. Keep these tips in mind:
- Color Coordination: Match the bench color or material with existing furniture to create a cohesive look.
- Decor Elements: Use decorative pillows or throws to enhance the visual interest of the bench, especially if it is tucked in a corner.
- Placement with Style: Position the bench against a wall or alongside a window. This can create a cozy nook that feels inviting.
Be Mindful of Temperature and Comfort
The comfort level of your dining bench relates directly to its location. Here are things to keep in mind:
- Drafts: Avoid placing your bench in areas where it might be exposed to drafts from doors or windows.
- Heat Sources: Steer clear of placing the bench too close to heating vents or fireplaces that may cause discomfort.
- Accessibility: Ensure the bench is easy to sit on and get up from. A location too far from the table can make it inconvenient for diners.
After considering all the above factors, you will be closer to selecting the ideal location for your dining bench. Remember, the perfect spot should enhance both the functionality and beauty of your dining area. Take your time to visualize different layouts in your space. A well-placed dining bench can become a favorite spot for family meals or casual gatherings, blending seamlessly into the flow of your home.
By focusing on your room’s layout, functionality, lighting, aesthetics, and comfort, you can successfully choose an optimal location for your dining bench. Each decision you make brings you one step closer to creating a welcoming environment that accommodates your lifestyle.
Conclusion
Building a dining bench is not only a rewarding DIY project, but it also enhances the charm and functionality of your home. By following the step-by-step guide outlined, you can create a sturdy, stylish piece that complements your dining area perfectly. Remember to gather all the essential tools and materials before you start, ensuring your project runs smoothly from the beginning to the end.
As you design your bench, let your creativity shine through. With various styles available—from rustic to modern—you can tailor your dining bench to fit your personal taste and the overall decor of your home. Once completed, take care of your new creation with regular maintenance tips, like proper cleaning and refinishing, to keep it looking great for years to come.
Choosing the right location for your dining bench is equally important. Whether it’s positioned against a wall, around a dining table, or even in your backyard, the right placement can enhance both the aesthetic appeal and the usability of your space.
By combining the right design, maintenance, and placement strategies, you end up with a dining bench that not only serves its purpose but also adds warmth and character to your home. So dive into this exciting project—your new favorite spot for dining and gathering awaits!