Designing Your Dewalt Table Saw Outfeed Table: Essential Features and Considerations
Designing a Dewalt table saw outfeed table is an essential step for any woodworker looking to improve their workflow and efficiency. The outfeed table allows support for longer cuts, reduces hassles, and minimizes the risk of injury. To get started, consider the essential features and factors that will enhance your table’s functionality and usability.
Key Features of a Dewalt Table Saw Outfeed Table
When designing your outfeed table, several key features are vital. Here’s a quick list of what you should consider:
- Sturdiness: The table must be both sturdy and stable to handle the weight of larger pieces of lumber.
- Height Adjustment: Adjustable height ensures that your table aligns perfectly with your saw blade.
- Material Selection: Choose durable materials like plywood or MDF to provide a stable surface.
- Foldability: A foldable design allows for easy storage when not in use, perfect for smaller workshops.
- Surface Area: Ensure ample space for handling both outgoing and incoming material.
Choosing the Right Dimensions
The dimensions of your outfeed table are crucial. A common recommendation is to make the table at least the same height as your table saw, which is typically around 34 inches. The depth can vary, but a surface width of 24-30 inches is often sufficient for most tasks.
Standard Table Dimensions
| Dimension | Measurement (inches) |
|---|---|
| Height | 34 |
| Width | 24-30 |
| Length | 48-60 |
Material Selection for Durability
Choosing the right materials can make a significant difference in the longevity of your outfeed table. Here are some popular options:
- MDF (Medium-Density Fibreboard): Easy to work with and offers a smooth surface.
- Plywood: Known for its strength and stability, making it ideal for heavier loads.
- Hardwood: While more expensive, hardwood can provide a beautiful finish and durability.
Construction Techniques
Effective construction techniques are essential for a sturdy outfeed table design. You could use pocket holes or screws for joining panels. A strong frame ensures that the table remains stable during operation. Here’s a basic framework to consider:
- Build a rectangular frame for the base.
- Add cross supports for additional stability.
- Attach the table top securely using wood glue and screws.
Height Adjustment Mechanism
A height adjustment mechanism allows for easy alignment with your table saw. You might use a simple screw jack or a more complex hydraulic system, depending on your needs. Make sure the mechanism is easy to operate while being robust enough to hold the weight of the materials.
Safety Considerations
Safety should always be your top priority. Ensure that:
- The outfeed table is positioned close to the table saw for convenience.
- There are no sharp edges or protruding screws.
- The outfeed table includes a stop block if cutting multiple identical pieces.
Final Touches
After construction, consider adding a finish to your outfeed table to protect against scratches and wear. A coat of polyurethane can provide an excellent protective layer, ensuring a long lifespan for your hard work.
Designing your Dewalt table saw outfeed table is an effective way to enhance your woodworking experience. By focusing on durability, functionality, and safety, you create a versatile space for flawless cuts and improved efficiency. As you embark on your building process, keep these considerations in mind, and your outfeed table will serve you well for years to come.
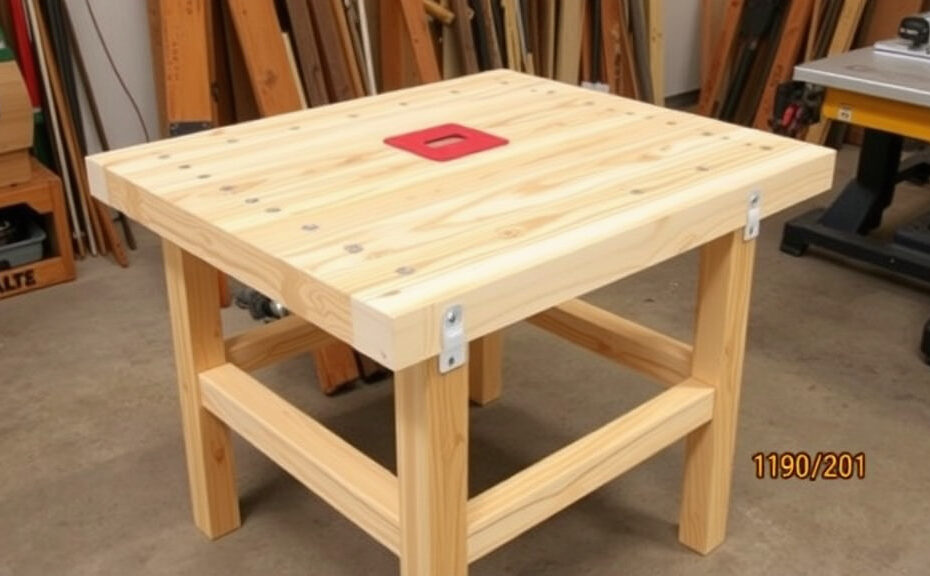
Step-by-Step Guide to Building Your Own Outfeed Table
Building your own outfeed table is a rewarding project that can dramatically enhance your woodworking experience, especially when using a Dewalt table saw. An outfeed table acts as an extended support system to help manage larger workpieces and improve your accuracy. Here’s a step-by-step guide to assist you in constructing a durable outfeed table tailored to your needs.
Gather Your Materials
Before you begin, ensure you have all the necessary materials. Here’s a list of what you’ll need:
- 3/4-inch plywood for the top
- 2×4 lumber for the frame
- Wood screws (at least 2.5 inches long)
- A set of casters (optional for mobility)
- Wood glue
- Measuring tape
- Square
- Saw (circular saw or table saw)
- Drill
- Sandpaper or sander
- Level
Design Your Outfeed Table
Determine the size of your outfeed table based on your workspace and the dimensions of your Dewalt table saw. The common width is around 30 inches and a length that matches or exceeds your table saw’s length. Here’s a simple design you can use:
| Dimension | Measurement |
|---|---|
| Width | 30 inches |
| Length | 48-72 inches (depending on your space) |
| Height | 36 inches (adjustable to match table saw height) |
Cut the Wood
Using your chosen saw, cut the plywood for the top of the table to the desired dimensions. Next, cut the 2x4s for the frame. Here’s how to assemble the frame:
- Cut four pieces of 2×4 to the desired length. These will serve as the support beams along the length.
- Cut two additional pieces to the desired width for the end supports.
- Assemble a rectangular frame by attaching the pieces together using wood screws and wood glue. Ensure everything is square.
Assemble the Tabletop
Once your frame is built, it’s time to attach the tabletop:
- Position the frame upside down.
- Center the plywood on top of the frame.
- Use screws to secure the plywood to the frame. Ensure the screws are spaced evenly about every 12 inches to maintain stability.
Add Legs and Casters
For a sturdy structure, attach the legs to the corners of the frame. Here’s how:
- Cut four pieces of 2×4 to your desired length for the legs.
- Use screws to attach each leg at a 90-degree angle to the frame. Ensure they are level.
- If you desire mobility, attach casters to the bottom of each leg. This will allow you to move the outfeed table as needed.
Finishing Touches
To complete your outfeed table, you can add a few finishing touches:
- Sand down any rough surfaces for safety and aesthetics.
- Consider applying a coat of polyurethane for durability.
- Mark important measurements directly on the top for convenience.
Align with Your Dewalt Table Saw
After constructing your outfeed table, ensure it is aligned properly with the table saw. This is crucial for accurate cuts. Use a level to adjust the height of your outfeed table if needed. Ideally, the tops of both tables should be flush with each other for seamless material handling.
Final Thoughts
Building your own Dewalt table saw outfeed table can enhance your workshop functionality. With this guide, you can create a reliable workspace that makes handling larger pieces easier and more efficient. Enjoy the process, and happy woodworking!
Materials and Tools Needed for a Durable Outfeed Table
Building a durable outfeed table for your Dewalt table saw is essential for efficient woodworking. An excellent outfeed table not only supports long pieces of wood but also enhances safety and accuracy in your cuts. To achieve the best results, you’ll need specific materials and tools. Here’s a comprehensive look at what you’ll need.
Essential Materials
Choosing the right materials is crucial when constructing a sturdy outfeed table. Below are key elements you should consider:
- Plywood: Use 3/4-inch thick plywood for the table surface. It provides strength and stability.
- 2×4 Lumber: A budget-friendly option for the frame and legs. It’s strong and widely available.
- Wood Glue: High-quality wood glue will help bond pieces together securely.
- Wood Screws: Use 1.25-inch screws for attaching the frame. This ensures a solid structure.
- Leveling Feet: Adjustable leveling feet are important for achieving a stable table, especially on uneven floors.
- Veneer or Laminate: To enhance surface durability and ease of sliding wood across the table, consider using a veneer or laminate layer on the plywood.
Tools Required
To construct your outfeed table, you’ll need a variety of tools. This list includes essential and handy tools for the task:
- Table Saw: Your Dewalt table saw will be the primary tool for cutting materials to size.
- Power Drill: Used for drilling holes and driving screws, a cordless drill offers convenience and portability.
- Measuring Tape: Accurate measurements are vital; ensure you have a good quality measuring tape on hand.
- Square: A framing square will help you check for right angles for a precise assembly.
- Sanders: Use a power sander or hand sanders to smooth edges, providing a clean finish to your table.
- Clamps: These are essential for holding pieces in place while you’re assembling the table.
- Safety Gear: Always wear safety glasses and hearing protection when using power tools.
Building Steps Overview
Now that you have the materials and tools, it’s helpful to know the basic steps involved in constructing your outfeed table:
- Measure and cut the plywood to your desired size for the table surface.
- Cut the 2×4 lumber to create a frame that will support the plywood.
- Assemble the frame using wood screws, ensuring everything is square.
- Securely attach the plywood to the frame using wood glue and screws.
- Add the adjustable leveling feet at each corner of the frame.
- sand any rough edges and consider applying a natural finish or a veneer for durability.
Maintenance Tips for Durability
Once your outfeed table is complete, maintaining it is essential to preserve its longevity:
- Regular Cleaning: Keep the surface free of debris and sawdust.
- Inspect for Damage: Periodically check for any signs of warping or severe wear.
- Re-Sand and Re-finish: If your surface gets damaged, a light sanding and reapplication of finish can restore it.
Building a durable outfeed table for your Dewalt table saw is not only a rewarding project but also a significant improvement to your workspace. With the proper materials and tools, you can create a sturdy and functional table that enhances your woodworking tasks, making long cuts safer and more manageable. Remember to regularly maintain your outfeed table to ensure it serves you well for years to come.
Common Mistakes to Avoid When Constructing an Outfeed Table
When constructing an outfeed table for your Dewalt table saw, it’s essential to avoid common pitfalls that can lead to frustration and inefficiency. A well-built outfeed table enhances your cutting capability by providing support for larger pieces of material. Here are some mistakes to watch out for and tips to ensure you end up with a functional and reliable creation.
Choosing the Wrong Height
One critical error is not aligning the height of the outfeed table with the table saw. An outfeed table set too low or too high can lead to uneven cuts, making your work more difficult. Ensure the top of the outfeed table is at the same level as the surface of your table saw. To achieve this, use the following simple steps:
- Measure the height of your table saw.
- Adjust your outfeed table height to match.
- Confirm the alignment by placing a straightedge across both surfaces.
Ignoring the Size and Stability
Another common mistake is not considering the size and stability of the outfeed table. If the table is too small, it may not adequately support larger materials, causing them to tilt or fall. On the other hand, if the table is too bulky, it may become a nuisance in your workspace.
Here are some guidelines to help determine the right size:
- Length: An outfeed table should ideally extend at least the length of the material you frequently work with.
- Width: A width of at least 24-30 inches can provide ample support.
- Stability: Use sturdy materials like plywood or MDF and ensure the frame has adequate bracing to prevent wobbling.
Not Providing Enough Support
Inadequate support beneath the outfeed table can lead to sagging or instability, especially under heavy loads. Ensure you reinforce the legs and cross-braces with durable materials. When constructing the legs, consider using:
- 2×4 lumber for the legs.
- Diagonal braces to prevent side-to-side movement.
- A wide base to ensure balance.
Failing to Accommodate Material Flow
It’s vital to design the outfeed table to accommodate the flow of material. Many users overlook the need for space before and after the cut. If your outfeed table is positioned too close to the wall or other obstacles, it can hinder your workflow. Here’s what you can do:
- Leave ample space: Ensure your outfeed table is at least a few feet from any wall or obstruction.
- Plan your workspace: Position the table for easy access, minimizing the need to move around during cuts.
Skipping the Finish
After completing your outfeed table, don’t forget about the finish. Some builders skip this step, thinking that it’s unnecessary. However, a smooth surface reduces friction, allowing materials to glide easily across the table. Consider applying:
- Sealer: A coat of polyurethane or varnish can protect the surface.
- Wax: Regular waxing can help maintain a slick and smooth finish.
Overlooking Portability
If your workspace is limited, you may want to create a portable outfeed table. However, many skip the design considerations necessary for portability. You may want to consider the following:
- Folding design: Construct your outfeed table to fold when not in use.
- Wheels: Adding lockable wheels enables easy movement.
Ignoring Safety Features
Don’t neglect safety features that can make your outfeed table more effective. For you to operate your saw safely, make sure your outfeed table includes:
- Rounded Edges: To prevent accidents when reaching for materials.
- Anti-Skid Surface: A non-slip top can minimize the chance of the material slipping during cuts.
Final Thoughts
Building an outfeed table for your Dewalt table saw can significantly improve your woodworking experience. By avoiding these common mistakes, you can create a table that not only enhances efficiency but also ensures a safer and more convenient workspace. Remember to stay mindful of dimensions, stability, support, flow, finish, portability, and safety. Taking these details into account while building will lead to a functional addition to your workshop that can handle any size material you throw at it. Happy building!
Enhancing Your Table Saw Experience: Accessories and Add-Ons for Your Outfeed Table
When working with your Dewalt table saw, having the right accessories for your outfeed table can significantly enhance your woodworking experience. An outfeed table provides essential support and stability, especially when cutting large sheets of material. However, it’s not just about having a flat surface. By incorporating certain add-ons, you can boost your efficiency, safety, and overall enjoyment of your table saw projects.
Why Use Accessories for Your Outfeed Table?
Accessories can transform a standard outfeed table into a more versatile workspace. Here are some major benefits:
- Improved Accuracy: Accessories can help you achieve more precise cuts by supporting material properly.
- Increased Safety: The right add-ons can minimize the risk of accidents by offering more control during operations.
- Enhanced Efficiency: With the right tools, you can save time and reduce the hassle of handling large pieces of wood.
Popular Accessories for Your Outfeed Table
Here are some accessories that can help you maximize your outfeed table’s potential:
- Roller Stands: These provide adjustable support for longer cuts. They can be positioned wherever you need extra help, making them perfect for larger projects.
- Outfeed Support Arms: These swinging arms can extend and retract as needed, providing flexibility and stability for varied sheet sizes.
- Push Sticks: Essential for keeping your hands away from the blade, push sticks allow for safer operation while you manage larger materials.
- Crosscut Sleds: By integrating this accessory with your outfeed table, you can achieve clean crosscuts and better material control.
Adding Depth with Storage Solutions
Storage is often an underrated aspect of woodworking. Consider adding a storage system to your outfeed table. Here’s how it can help:
- Organized Workspace: Keep your essential tools and accessories within easy reach to streamline your workflow.
- Maximized Surface Area: Use bins or drawers to keep your surface clear of clutter while still having what you need close by.
Customization Options for Personal Use
Your outfeed table can be more than just a support surface; it can reflect your personal style and meet specific needs. Here are a few customization ideas:
- Increase Surface Size: Consider adding a larger top if you frequently work with large sheets of plywood.
- Magnetic Strips: Attach these to hold small tools, ensuring they’re always visible and at your fingertips.
- QR Code Labels: Create labels for tools or materials that link to tutorials or reference guides, making your setup educational as well as functional.
Maintenance Tips for Optimal Performance
To ensure that your accessories and outfeed table serve you well over time, consider these maintenance strategies:
- Regular Cleaning: Dust and debris can impact your table’s performance. A quick daily clean will keep everything running smoothly.
- Inspect for Wear: Regularly check your accessories for signs of wear or damage. Replace any parts that are no longer effective.
- Adjust Height Regularly: Keep tables and supports at the right height for your projects to enhance safety and accuracy.
Table of Recommended Accessories
| Accessory | Benefits | Price Range |
|---|---|---|
| Roller Stands | Adjustable support for longer materials | $30 – $100 |
| Outfeed Support Arms | Provides excellent stability for varying sheet sizes | $50 – $150 |
| Push Sticks | Keeps hands safe while cutting | $5 – $20 |
| Crosscut Sleds | Allows precise and clean crosscuts | $50 – $200 |
Enhancing your table saw experience requires thoughtful consideration of accessories and add-ons for your outfeed table. By focusing on utility, safety, and personalization, you can make your woodworking activities more enjoyable and efficient. Remember to choose accessories that cater to your specific woodworking needs, and take good care of them so you’ll reap the benefits for years to come.
Key Takeaway:
Creating a Dewalt Table Saw outfeed table is an essential project for any woodworker looking to enhance efficiency and safety in their workspace. This article encapsulates the key takeaways from several important topics covering the design, construction, materials, common pitfalls, and possible enhancements for your outfeed table.
First, when designing your outfeed table, consider essential features such as stability, size, and height adjustability. A well-designed outfeed table should support large pieces of wood safely while minimizing the risk of tipping or collapsing. Keep in mind that the height of your table should align with your Dewalt Table Saw to ensure a seamless workflow.
The step-by-step guide provided narrows down the construction process. Following a structured approach is key, from cutting down the wood and assembling the frame to securing the tabletop. Each step should highlight how to align the edges and ensure the surface remains level. Proper alignment avoids difficulties in material handling, significantly improving the cutting process.
In terms of materials and tools, focus on selecting durable options like plywood or hardwood for longevity. You’ll need basic tools such as saws, drills, clamps, and measuring tapes. A sturdy foundation will also ensure that your outfeed table remains functional for years to come.
Avoiding common mistakes is crucial. Many people underestimate the importance of the table’s height or overlook securing all joints adequately. Taking the time to read through a checklist of errors to avoid can save you time and resources. It is better to invest extra effort upfront than to redo work later.
Consider enhancing your table saw experience with accessories and add-ons. Optional features like integrated storage, clamps, or extensions can elevate your setup. Not only do these improve the utility of the outfeed table, but they also add convenience that can free up workspace.
Building a Dewalt Table Saw outfeed table involves careful planning, proper selection of materials, awareness of potential mistakes, and the consideration of enhancements to enrich your woodworking experience. By integrating all these aspects, you can create a functional and efficient outfeed table that significantly boosts your productivity in the workshop.
Conclusion
Creating your own Dewalt table saw outfeed table is not only a rewarding project but also an investment in your woodworking efficiency. By understanding the essential features and considerations in the design phase, you can ensure that your outfeed table meets your specific needs and seamlessly accommodates your workflow.
Following a step-by-step guide will help you navigate the building process, making it accessible even for beginners. Selecting quality materials coupled with the right tools is crucial for constructing a durable and reliable table that will withstand years of use. Remember, avoiding common pitfalls during construction will save you time and resources, allowing you to focus on perfecting your woodworking skills.
Once your outfeed table is built, you can further enhance your experience by exploring various accessories and add-ons. These enhancements aren’t just about increased functionality; they also provide more comfort and safety while working. Whether it’s clamps, extensions, or storage solutions, pairing your table saw with the right accessories can transform your workflow.
Completing this project opens up a new level of productivity in your workshop. As you enjoy the benefits of your custom outfeed table, you’ll quickly realize how it can streamline your cutting process, improve material handling, and ultimately contribute to the quality of your projects. Embrace the process, and let your creativity shine as you build and customize your perfect outfeed table. Your woodworking endeavors will thank you!