Essential Bed Woodworking Plans for Beginners
Creating your own bed can be an exciting and fulfilling project, especially if you’re a beginner in woodworking. With the right woodworking plans, you can build a beautiful and functional bed that fits your style and needs. Below are some essential bed woodworking plans designed specifically for beginners.
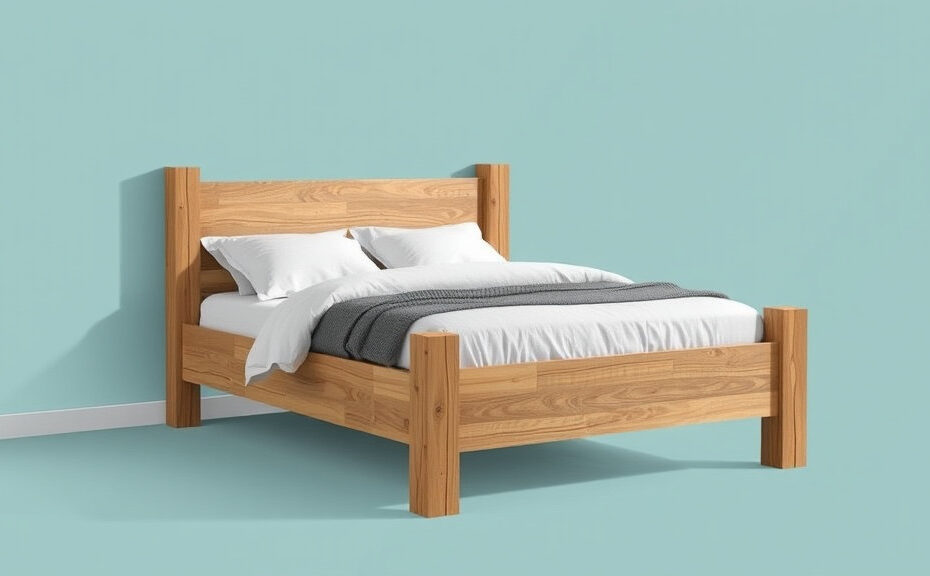
Platform Bed Plan
A platform bed is perfect for beginners due to its simple design and straightforward construction. This type of bed provides a sturdy base for your mattress without the need for a box spring. Here’s a step-by-step guide:
- Materials Needed:
- Wood boards (2x4s or 2x6s)
- Screws
- Plywood for the bed base
- Wood finish (optional)
- Tools Required:
- Circular saw
- Screwdriver
- Measuring tape
- Sandpaper
- Steps:
- Measure the mattress dimensions.
- Cut the wood boards to create the frame of the bed.
- Assemble the frame using screws, making sure it’s sturdy.
- Cut the plywood to size and secure it to the frame.
- Sand the edges and apply wood finish if desired.
Rustic Farmhouse Bed Plan
If you’re drawn to a cozy, rustic look, a farmhouse bed plan might be just right. These beds often feature reclaimed wood and a charming aesthetic. Here’s how you can create one:
- Materials Needed:
- Reclaimed wood (1x6s for the headboard and footboard)
- Wood glue
- Screws
- Wood stain or paint (optional)
- Tools Required:
- Miter saw
- Drill
- Clamps
- Level
- Steps:
- Cut the wood into planks for the headboard and footboard.
- Assemble the headboard using wood glue and screws.
- Attach the footboard similarly.
- Connect both with side rails for stability.
- Finish with stain or paint to enhance its rustic charm.
Bunk Bed Plan
If you’re working with limited space and need a solution for kids or guests, a bunk bed is an excellent project. Although more complex, it is achievable with patience. Follow these basic guidelines:
- Materials Needed:
- Wood boards (2x4s and 2x6s)
- Wood screws
- Wood glue
- Tools Required:
- Power drill
- Saw
- Measuring tape
- Safety goggles
- Steps:
- Measure and cut wood for both beds.
- Create the lower bed structure first, ensuring stability.
- Add risers for the top bunk and secure them properly.
- Attach the upper bed frame to the risers, ensuring it’s level.
- Finish with a suitable coat of varnish or paint.
DIY Bed Frame Plan
A DIY bed frame is another great project suitable for beginners. This bed frame can be customized based on size and design preferences. Key steps include:
- Materials Needed:
- Plywood for the platform
- Wood for the frame (2x4s)
- Wood screws
- Steps:
- Measure your mattress dimensions carefully.
- Cut wood pieces to frame the base.
- Assemble the frame and attach the plywood on top.
- Sand any rough edges for safety and comfort.
These essential bed woodworking plans are perfect for beginners looking to enhance their skills while creating something special. Each of these projects not only caters to novice woodworkers but also allows for creativity and personal expression. Remember, the key to success in woodworking is patience and practice—so gather your materials, follow your chosen plan, and enjoy the process of building your own bed!
Top Materials to Consider for Your Bed Projects
When starting a bed woodworking project, choosing the right materials can make all the difference. Various options offer unique benefits and aesthetics, allowing you to customize your bed for both function and style. Here’s a look at some top materials you might consider for your bed projects.
Solid Wood
Solid wood is often the first choice for many woodworkers. Its durability, resilience, and natural beauty make it a standout option. There are several types of solid wood that you can select for your bed builds:
- Oak: Known for its strength and grain patterns, oak is perfect for sturdy bed frames. It can withstand wear and tear over time.
- Pine: This is a softer wood that is easier to work with and can be an affordable option. Pine can be stained or painted to achieve your desired look.
- Cherry: Often chosen for its rich color, cherry wood matures beautifully, making it a great long-term investment.
- Walnut: This wood provides a rich color and texture that can add elegance to any bedroom setting.
Plywood
Plywood is a versatile material that offers many advantages. It consists of layers of wood veneer glued together, providing stability and resistance to warping. Here’s why you might want to use plywood in your bed projects:
- Cost-Effective: Plywood is generally less expensive than solid wood, making it a budget-friendly option.
- Strength: With proper usage, plywood can hold great weight, making it suitable for mattress support.
- Variety: Plywood comes in various grades and finishes, allowing you to choose one that fits your design.
Engineered Wood
Engineered wood refers to composite materials created from wood fibers, strands, or particles. It’s an innovative option that offers great durability and is often more environmentally friendly. Here are some types to consider:
- MDF (Medium Density Fiberboard): This is smooth and easy to paint, making it ideal for creative designs.
- OSB (Oriented Strand Board): OSB is made from compressed wood strands, providing excellent strength and is cost-effective.
- Particle Board: Good for budget builds, particle board is lightweight, but it’s less durable than other options.
Metal
Metal frames have gained popularity in modern bed designs. They provide a sleek, contemporary look and are often utilized in platform beds. Consider these benefits:
- Durability: Metal beds can last for decades with minimal maintenance.
- Support: Metal offers strong support for heavier mattresses and sleepers.
- Design Flexibility: There are numerous designs available, from minimalist to ornate.
Fabric and Upholstery Materials
If you aim for a softer look, especially for headboards, consider fabric and upholstery materials. Here’s what you can think about:
- Microfiber: This is easy to clean and resistant to stains, making it a practical choice.
- Leather: Offers a classic, luxurious feel and is quite durable.
- Canvas: This can provide a more casual look and is often used in children’s room beds.
Finishes and Paints
Don’t overlook the importance of the finish you use. Different finishes can enhance the natural beauty of the wood or change the overall aesthetic of the bed. Here are some options:
- Varnish: Provides a hard finish to protect the wood while highlighting the grain.
- Stain: Changes the color of the wood while maintaining its texture.
- Paint: Offers endless color choices but can conceal the wood grain for a different look.
By carefully selecting the right materials for your bed woodworking projects, you’ll ensure that your piece will not only look great but also last for years. Remember, the choices you make reflect both your style and your practical needs. With the right foundation, your bed can become a centerpiece of comfort in your bedroom.
Creative Design Ideas for Custom Beds
When designing a custom bed, the options are as vast as your imagination. Whether you’re creating a bed from scratch or simply looking to refresh an existing one, unique design ideas can transform a simple frame into a stunning centerpiece. Here are some innovative concepts that you might consider for your next project.
Choosing Your Style
Every custom bed project starts with a decision about the style. The following styles can guide your creative design process:
- Modern Minimalism: Think clean lines and simplicity. A platform bed with a low profile creates an airy feel.
- Rustic Charm: Use reclaimed wood for a warm, homey look. A farmhouse-style bed can bring nature indoors.
- Vintage Elegance: Antique headboards combined with modern materials can offer a beautiful contrast.
- Bohemian Vibes: Mix and match fabrics and textures to create a bed that feels cozy and artistic.
Material Selection
The materials you choose can drastically alter the appearance and functionality of your custom bed. Here’s a breakdown of various materials and their impact:
| Material | Characteristics |
|---|---|
| Wood | Warm, sturdy, and versatile; can be stained or painted. |
| Metal | Durable and sleek; offers a modern touch. |
| Fabric | Softens the look; available in countless colors and patterns. |
| Leather | Luxurious and timeless; adds sophistication. |
Functional Features
Your custom bed can be more than just a sleeping area; why not include some functional features? Here are a few ideas:
- Storage Drawers: drawers or boxes can help maximize space, especially in smaller rooms.
- Built-in Lighting: Adding LED strips or reading lights provides both ambiance and utility.
- Adjustable Headboards: Consider headboards that can be adjusted for comfort when sitting up in bed.
- Integrated Workspaces: A pull-out desk surface can be handy for those who work or study in bed.
Personal Touches
Make your bed uniquely yours by adding personal touches. Here are some ideas:
- Custom Upholstery: Choose fabrics that reflect your personality or coordinate with your bedroom décor.
- Paint and Stain: Consider a bold color or interesting finish that adds flair to your bed frame.
- Artistic Elements: Incorporate carved designs or decorative elements that showcase your style.
- Monograms or Initials: Embedding personal icons or names gives a charming touch.
Creating the Perfect Bedside Setup
Once your custom bed stands proudly in your room, consider what to place beside it. A thoroughly curated bedside setup can enhance your bedroom’s aesthetic:
- Nightstands: Choose matching or contrasting nightstands that complement your bed style.
- Lamps: Opt for visually appealing lamps that match your bedroom theme.
- Decorative Accents: Add frames, books, or scented candles to personalize the area.
Designing a custom bed is a creative and fun process. By selecting a style, material, incorporating functional features, and adding personal touches, you can create a bed that reflects your unique taste and enhances your space. Start imagining your dream bed today, and let your creativity flow!
Common Mistakes to Avoid in Bed Woodworking
When you take on a bed woodworking project, it’s important to avoid common pitfalls that can lead to frustration or wasted materials. Let’s explore some of the most frequent mistakes and how you can steer clear of them.
Ignoring Measurements
One of the biggest oversights in bed woodworking is neglecting to take accurate measurements. Incorrect measurements can cause parts to not fit together properly or lead to a bed that as a whole doesn’t meet your size requirements.
- Double-check your specifications. Always measure twice to confirm the dimensions are accurate.
- Use proper tools. A good tape measure and possibly a square or level can help ensure precision.
Choosing the Wrong Materials
Selecting the right type of wood is crucial for the durability and appearance of the finished product. Here are some pointers to consider:
- Hardwoods vs. Softwoods: Hardwoods like oak or maple provide strength, while softwoods can be easier to work with but may lack durability.
- Grain Orientation: Consider how the grain will affect the final appearance of your bed.
Neglecting Design Plans
Some people leap into building without a solid plan. Without clear woodworking plans, you may overlook important features such as support structures and joinery methods.
- Research designs: Look online for bed woodworking plans that suit your style and skill level.
- Customizing plans: Don’t hesitate to modify existing plans to better fit your needs; just ensure changes won’t compromise the structural integrity.
Forgetting About the Joinery
Joinery is a vital factor in bed woodworking that is often underestimated. Poor joints can lead to a flimsy structure.
- Choose the right type of joint: Mortise and tenon or lap joints are strong options for construction.
- Practice your joinery technique: Try a few test pieces to get comfortable with your joinery method before working on your bed.
Overlooking Sanding and Finishing
Many woodworkers rush through sanding and finishing, which can result in a rough finish or even splinters. Take your time with this crucial step.
- Use a sanding block: Sanding blocks allow for greater control and even pressure.
- Finish choices: Consider different types of finishes like oil, lacquer, or polyurethane to protect the wood and enhance its look.
Rushing the Assembly
It can be tempting to quickly assemble all parts, but hasty work often leads to mistakes.
- Align pieces carefully: Take your time to ensure everything fits snugly before securing them.
- Use clamps: Clamps can hold pieces in place while you secure them, making it easier to ensure proper alignment.
Skipping Safety Protocols
Safety should always be a priority when working with tools. Neglecting safety can not only injure you but also ruin your project.
- Wear protective gear: Always use goggles and gloves to shield yourself from dust and debris.
- Keep your workspace organized: A clean workspace can prevent accidents caused by tripping over tools or materials.
Failure to Seek Help
It’s okay to ask for assistance when needed. Many woodworking projects, especially beds, can be complex. If you’re unsure about a technique or approach, don’t hesitate to seek guidance.
- Join a woodworking community: Online forums and local clubs can offer valuable insights from experienced woodworkers.
- Watch instructional videos: They can provide visual guidance and tips that might aid you in avoiding mistakes.
By avoiding these common mistakes in bed woodworking, you can save time, money, and frustration. Building a bed can be a rewarding experience, and by reinforcing your knowledge of best practices, you’ll ensure that your project turns out beautifully. Remember, attention to detail can lead to rewarding outcomes and a piece of furniture you’ll be proud to showcase!
How to Finish and Protect Your Bed Wood Projects
When you’ve meticulously crafted a wooden bed, the finishing touches are essential for both aesthetics and durability. How you finish and protect your bed wood projects can greatly impact their lifespan and appearance. Here’s a practical guide to ensure your wooden masterpiece not only looks stunning but also stands the test of time.
Choosing the Right Finish
Selecting the appropriate finish is crucial for the wood’s protection. Each type of finish has its own unique properties, and understanding these can help you make the best choice for your project.
- Polyurethane Varnish: This is a popular choice for its durability. It forms a tough layer over the wood, making it resistant to scratches and moisture.
- Oil Finish: This includes products like Danish oil and Tung oil. They penetrate the wood and provide a natural look, though they require more frequent reapplication.
- Shellac: This quick-drying finish provides a beautiful gloss but may not be as durable against water and heat.
- Wax: Often used in conjunction with other finishes, wax gives a soft sheen but offers low protection compared to others.
Preparation for Finishing
Before applying any finish, it’s vital to prepare your wood surface properly. Follow these steps to ensure a smooth application:
- Sanding: Begin with a coarse grit sandpaper, gradually moving to finer grits. This process removes imperfections and opens the wood pores.
- Cleaning: After sanding, clean the surface with a damp cloth to remove dust particles. Let it dry completely before applying the finish.
Application Techniques
How you apply the finish is just as important as what you use. Here are several techniques to consider:
- Brushing: This is ideal for varnishes and paints. Use a high-quality brush to avoid streaks and achieve an even application.
- Rolling: This method works well for large flat surfaces and can reduce the risk of brush marks.
- Spraying: A spray gun provides an ultra-smooth finish, perfect for intricate details. Make sure to practice first, as this technique requires a steady hand.
- Wiping: Applying oil finishes requires a simple wipe-on, wipe-off technique for even distribution and absorption.
Understanding Drying and Curing Times
Once you’ve applied your chosen finish, understanding the drying and curing process is key to achieving the best result. Different products have varying times:
| Finish Type | Drying Time | Curing Time |
|---|---|---|
| Polyurethane | 1-6 hours | 30 days for full hardness |
| Oil Finish | 2 hours | 7 days |
| Shellac | 30 minutes | 1-2 hours for full cure |
Make sure to follow the manufacturer’s guidelines. While a finish may feel dry to the touch, it may still need time to fully cure, which is essential for maximum protection.
Maintaining Your Finish
Once your bed is finished and dried, regular maintenance will help keep it looking great. Consider these tips:
- Cleaning: Dust your wooden bed frequently with a soft cloth. Avoid using harsh chemicals that can strip the finish.
- Reapplication: Depending on your finish, you may need to reapply the product every few years or whenever you notice wear.
- Placing Coasters: Use coasters under drinks to prevent rings and spills.
By understanding the finishing process and caring for your wood projects, your bed can maintain its beauty and integrity for many years. So dive into your next project with confidence, knowing that your hard work will be well-protected!
Key Takeaway:
When embarking on bed woodworking projects, there are several essential factors to consider to make your experience enjoyable and successful. First and foremost, having a foundation of essential bed woodworking plans is crucial for beginners. These plans provide step-by-step guidance, ensuring that novice woodworkers understand the process and can visualize the final product. It’s important to select plans that match your skill level and offer clear instructions.
Additionally, choosing the right materials is a key component of any woodworking project, and beds are no exception. Opt for sturdy materials like hardwood, plywood, or reclaimed wood, which will ensure longevity and sturdiness in your final piece. Each type of wood has its unique benefits, so understanding these can significantly improve your craftsmanship. For example, hardwoods like oak or maple can give your bed an elegant finish, while plywood can offer a cost-effective alternative without sacrificing durability.
Moreover, your bed can be a reflection of your personal style. Creative design ideas for custom beds can take your woodworking to the next level. Consider experimenting with different shapes, colors, and features like bookcases or drawers integrated into the frame. These innovative designs not only add functionality but also elevate your bedroom decor.
It’s also essential to be aware of common mistakes that can occur in bed woodworking. Beginners often overlook accurate measurements or don’t pay enough attention to joinery techniques. Being aware of these pitfalls can prevent frustration and wasted materials, making your journey smoother.
Finishing and protecting your bed wood projects should not be underestimated. A well-applied finish not only enhances the aesthetic appeal but also protects the wood from wear and tear. Options like stains, varnishes, or oils can elevate the look of your project while ensuring durability.
Whether you’re a beginner or looking to refine your skills, focusing on solid plans, proper materials, creative designs, avoiding common mistakes, and applying the right finish are essential takeaways for successful bed woodworking projects. By following these guidelines, you’ll be well on your way to crafting a beautiful and functional piece that you can cherish for years to come.
Conclusion
Embarking on your bed woodworking journey can be both exciting and rewarding. As a beginner, it’s essential to familiarize yourself with the fundamental woodworking plans designed specifically for crafting beds. These plans serve as a roadmap, guiding you through your projects with clear instructions and helpful tips.
Choosing the right materials is crucial for the durability and aesthetic appeal of your creations. Opt for high-quality woods like oak or maple, which not only ensure sturdiness but also add a touch of elegance to your furniture. Don’t shy away from experimenting with creative design ideas such as platform beds, bunk beds, or adjustable beds that reflect your personal style and meet your artistic vision.
While crafting your bed, it’s important to remain aware of common pitfalls that can hinder your success. Avoid rushing through measurements or overlooking safety precautions, as these mistakes can cost you time and resources. By acknowledging these errors early on, you can create more polished and professional-looking pieces.
As you complete your projects, do not underestimate the significance of finishing and protecting your work. Applying proper finishes not only enhances the beauty of the wood but also protects it from wear and tear over time. Whether you choose stains, paints, or sealants, make sure to follow the necessary steps for a flawless finish.
With the right plans, materials, and mindful approaches, you can transform your ideas into stunning, functional beds that reflect your craftsmanship and creativity. Dive into your woodworking projects, and enjoy the journey of creating beautiful, lasting pieces for your home.