Constructing a Bird Feeder Out of Wood: Step-by-Step Guide
Making a bird feeder out of wood is a fulfilling project that allows you to connect with nature and enjoy the beauty of birds in your backyard. With a few simple materials and tools, you can create a stylish and functional feeder. Below, you’ll find a step-by-step guide to constructing your very own bird feeder. Let’s get started!
Materials Needed
- Wood (such as cedar or pine)
- Screws or nails
- Wood glue
- Waterproof wood sealer
- Sandpaper
- Pencil
- Measuring tape
- Hand saw or power saw
- Drill
- Paint or wood stain (optional)
Step 1: Plan Your Design
Before you begin cutting any wood, take a moment to sketch out your design. A simple bird feeder typically consists of a base, four walls, and a roof. Consider the size of the feeder; a good standard measure is about 8 inches wide by 8 inches deep by 10 inches tall. This size works well for a variety of bird species.
Step 2: Cut the Wood
Now it’s time to cut your wood pieces according to your plan. Here’s what you’ll need:
- Base: 8” x 8” piece
- Four walls: 8” x 10” pieces (two front and back; two sides should be 8” x 10” as well)
- Roof: Two triangular pieces measuring about 9” x 7” for a sloped roof
Use the hand saw or power saw to carefully cut these pieces. Always be cautious and wear protective gear while using cutting tools.
Step 3: Assemble the Walls
To start assembling, take the base piece and lay it flat. Attach the walls using wood glue, reinforcing them with screws or nails. Begin with the front and back walls, then attach the two side walls. Ensure that everything is flush and square.
Step 4: Attach the Roof
Once the walls are secure, it’s time to add the roof. Take the two triangular pieces and place them on top of the walls, creating a sloped effect. Use wood glue and screws to secure them. This slope will help water run off and maintain the feeder’s durability.
Step 5: Create a Seed Tray
To prevent seed waste and keep the area clean, you may want to create a small seed tray. Cut a piece of wood that is slightly smaller than the base (maybe about 7” x 7”). You can attach this piece inside the feeder, approximately an inch off the base. Drill small holes in the tray for drainage. This helps keep the seeds dry.
Step 6: Sand and Finish
It’s time to smooth out any rough edges with sandpaper. Take care to sand all visible surfaces thoroughly, which will help prevent any potential for splinters. After sanding, you can either paint or apply a wood stain for aesthetics. Make sure to use products that are non-toxic and safe for the birds.
Step 7: Seal Your Bird Feeder
To ensure your bird feeder lasts through various weather conditions, applying a waterproof wood sealer is advisable. Follow the manufacturer’s instructions and allow it to dry completely before proceeding.
Step 8: Install Your Feeder
Choose a suitable location to hang your bird feeder. Ideally, it should be placed in a spot that is visible from a window and away from potential predators. Use a sturdy hook or mount it on a pole to keep it stable.
Step 9: Fill the Feeder
Once installed, fill the feeder with birdseed. You can use a mix formulated for your local bird species. Common choices are sunflower seeds, millet, or mixed seed blends. Regularly check the feeder to refill it and keep it clean.
Step 10: Enjoy Birdwatching!
Your wooden bird feeder is complete. Sit back, relax, and watch as various birds visit your backyard. This project not only enhances your outdoor space but also supports local wildlife.
Constructing a bird feeder out of wood is an enjoyable activity that brings joy to both you and the birds. By following these steps, you’ll create a durable and charming feeder that can be appreciated for years to come. Happy birdwatching!
Essential Tools and Materials for Your DIY Bird Feeder
If you’re excited about bringing beautiful birds to your backyard, creating a DIY bird feeder is an excellent project to consider. With the right tools and materials, you can easily construct a bird feeder that not only serves its purpose but also adds charm to your outdoor space.
When preparing for your DIY bird feeder project, it’s crucial to gather a list of essential tools and materials. Having everything ready will streamline the process and enhance your crafting experience. Here’s what you will need:
Tools Required
- Saw: A handsaw or a power saw will be necessary to cut the wood to the desired lengths.
- Drill: Use a drill to make holes for screws or for hanging your feeder. A small drill bit will work well for creating drainage holes.
- Screwdriver: A compatible screwdriver will help you secure the components of the bird feeder.
- Measuring Tape: Accurate measurements are key to ensuring that all parts fit together correctly.
- Sandpaper: You’ll want this to smooth out any rough edges on the wood to prevent injury to the birds.
- Level: Keeping your bird feeder level ensures that food does not spill and birds can perch comfortably.
- Paintbrush (optional): If you choose to paint or seal your feeder, a paintbrush will help you apply the finish evenly.
Essential Materials
Next, you’ll need to select quality materials to build your bird feeder. Here’s a list of materials to consider:
- Wood: Choose untreated wood like cedar, pine, or plywood for your feeder. Avoid treated wood, as it may contain chemicals that can harm birds.
- Screws: Use galvanized or stainless steel screws to prevent rusting when exposed to the elements.
- Wood Glue: If you want extra stability, wood glue can help secure pieces together in addition to screws.
- Finishing Material: Applying a non-toxic sealant or paint can protect your feeder from the weather and prolong its life. Always ensure any product used is safe for wildlife.
- Birdseed: Knowing the type of birds you want to attract will help you choose the right seed blend.
- Optional Decorative Elements: Consider adding decorative touches like a roof or perch made from branches or twine.
Choosing the Right Design
When it comes to the design of your bird feeder, it’s essential to pick one that suits both your style and functionality. Popular designs include:
- Platform Feeder: A simple flat platform that allows birds to access seed from all angles.
- Hopper Feeder: A feeder with a storage area for seeds that dispenses seed as the birds eat.
- Tube Feeder: Long and narrow, this design is ideal for small birds needing perch space.
Each design calls for slightly different measurements and construction techniques, so make sure to pick one that feels right for your level of experience.
Once you’ve gathered your tools and materials, it’s time to get started on your bird feeder. Before building, sketching out your design can help visualize the dimensions and assembly process. Planning thoroughly will save you time and make the construction smoother.
Remember to keep safety in mind throughout your project. Use goggles when cutting wood and make sure your workspace is clear and organized. Taking the time to prepare will ensure a successful build.
Creating a bird feeder is not just rewarding; it also nurtures a connection with nature. As you watch the birds gather at your feeder, you’ll appreciate the effort you put into making their dining experience delightful. With the right tools and materials, your DIY project will surely be a success!
So, gather everything you need, roll up your sleeves, and enjoy the process of crafting something wonderful for your feathered friends!
Different Design Ideas for Wooden Bird Feeders
Creating a bird feeder out of wood can be a delightful project for bird enthusiasts and DIY lovers alike. Not only does it add beauty to your yard, but it also invites a variety of birds for you to enjoy watching. Here are some different design ideas that can transform your wooden bird feeder project into a unique centerpiece in your garden or yard.
Simple Platform Feeder
This design serves as a great starting point for beginners. The platform-style feeder is easy to build and requires only a flat piece of wood for the base, along with some wood for the sides.
- Materials: A square or rectangular piece of plywood, wooden stakes for legs (optional), and screws or nails to secure the pieces.
- Steps: Cut the plywood into your desired size and attach four pieces of wood as sides to keep the seed in place. Optionally, use wooden stakes for legs to elevate the feeder above the ground.
This simple feeder attracts a wide range of birds, making it perfect for attracting local species.
Hopper Feeder
Hopper feeders are designed to hold a considerable amount of seed, making them ideal for busy feeding times. This type of feeder allows birds to access seeds from below while keeping the rest dry and fresh.
- Materials: Wood for the base, walls, and roof, clear acrylic for the viewing window, and a small perch.
- Steps: Create a box-like structure with a sloped roof. Ensure there’s a tray at the bottom where the seeds will collect. Cut a small hole for birds to reach food and attach a clear panel so you can see when it’s time to refill.
This design helps feed various bird species and keeps seeds safe from rain and wind.
Suet Feeder
Suet feeders attract backyard birds like woodpeckers and nuthatches. This is particularly useful during the winter months when food is scarce.
- Materials: Hardwood for durability, wire mesh or large holes for drainage, and strong hooks or a wire frame for hanging.
- Steps: Build a small box that incorporates mesh for ventilation. Fill the box with suet cakes made from rendered fat and seeds to keep your feathered friends happy.
A suet feeder is essential for attracting birds that love high-fat foods.
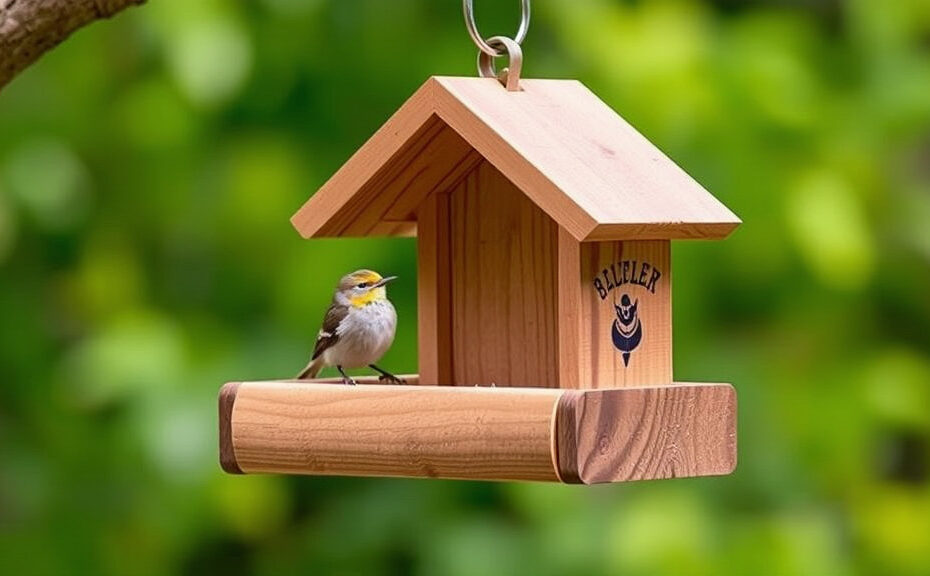
Decorative Birdhouse Feeder
If you’d like a design that’s equally functional and artistic, consider crafting a bird feeder that looks like a birdhouse. This combines the function of feeding with charming decor.
- Materials: Plywood, paint for aesthetics, small openings for bird access, and a sloped roof.
- Steps: Build a traditional birdhouse shape but with an opening at the bottom for easy bird access to the seeds. Decorate it with weather-resistant paint to give it character.
This type will not only provide food for birds but also enhance the visual appeal of your outdoor space.
Pole-mounted Feeder
For those who want to add some height to their bird feeders, a pole-mounted design could be a perfect fit.
- Materials: A long wooden pole, wooden feeder box, and a sturdy base.
- Steps: Attach your feeder box to the top of the pole and secure the pole in the ground or a strong base. This elevates the feeder and can keep it safe from ground predators.
Pole-mounted feeders allow for easy viewing of birds in your yard.
Rain-Gutter Feeder
Using an old rain gutter is an innovative and cost-effective way to create a bird feeder. This design lets you use materials you may already have.
- Materials: A piece of rain gutter, end caps, brackets for mounting, and drainage holes.
- Steps: Cut the gutter to your desired length, attach the end caps, and mount it horizontally to a post or wall. Don’t forget to drill small holes for water drainage.
This unique design is an interesting conversation piece and is functional as well.
These design ideas provide various options for crafting a wooden bird feeder. Each one can enhance your garden while supporting local wildlife. Enjoy the satisfaction of building a feeder with your hands, and take pleasure in the vibrant birds it attracts!
Tips for Choosing the Right Location to Hang Your Bird Feeder
Setting up a bird feeder is a great way to attract these beautiful creatures into your backyard. However, choosing the right location to hang your bird feeder is just as important as the feeder itself. A well-placed bird feeder can ensure that you enjoy a steady stream of visitors, while a poorly positioned one may leave you disappointed. Here are some helpful tips to find the perfect spot for your bird feeder.
Consider the Surroundings
When picking a location, it’s crucial to think about your yard’s environment. Birds feel most comfortable in an area where they can easily perch and observe for predators. Look for these key elements:
- Trees and Shrubs: Choose a spot near trees or dense shrubs. These provide shelter for birds, making them feel safer.
- Open Space: Make sure there’s some open space so birds can spot potential dangers while they feed.
- Water Sources: Placing your feeder close to a birdbath or natural water source can attract more birds.
Height Matters
Bird feeders should ideally be hung between 5 to 6 feet off the ground. This height is both safe for birds and accessible for you to refill. Additionally, consider these points:
- Predator Protection: Elevation helps reduce the chances of predators like cats sneaking up on the birds.
- Visibility: A feeder positioned at eye level allows you to enjoy watching the birds while feeding.
Avoid Direct Sunlight
While many species enjoy sunny spots, it’s wise to avoid hanging your bird feeder in direct sunlight for prolonged periods. Here’s why:
- Seed Freshness: Sunlight can spoil bird seed quickly, causing it to go rancid. Look for shaded areas to protect your feed.
- Comfort for Birds: Birds prefer cooler spots when eating, especially during hot summer months. A little shade goes a long way in making them feel comfortable.
Access to the Feeder
For your convenience, make sure the feeder is easily accessible. You will need to refill the seed frequently, depending on how popular your feeder becomes. Here are a few things to keep in mind:
- Close to Walking Paths: Position the feeder near a pathway or patio, so you can quickly restock it.
- Sturdy Support: Ensure your feeder is hung on a strong branch or metal pole to prevent wobbling.
Consider the Direction of the Wind
Understanding the wind pattern in your area is beneficial for bird feeding. Strong winds can make eating in an exposed feeder quite challenging for birds. Here’s how to mitigate this issue:
- Wind Protection: Place your feeder near a building or larger shrub to act as a wind break.
- Facing Away from Strong Winds: Try to locate your feeder facing opposite the prevailing winds for easier feeding experiences.
Observe Human Activity
Birds are sensitive to noise and movement. Too much human activity can scare them away. Follow these guidelines when considering human traffic:
- Quiet Corners: Select areas of your yard that are less frequented by people and pets.
- Viewing Points: While you want to stay out of their way, consider how you will view the birds without bothering them.
Test and Adjust
Don’t be afraid to experiment with the placement of your bird feeder. If you notice that birds aren’t visiting, try repositioning it. Adjusting the location based on your observations can enhance your birdwatching experience. Remember, patience is key. It might take some time for birds to discover your feeder.
Finding the right location for your bird feeder can significantly influence how many birds visit your yard, making your birdwatching experience more enjoyable. By carefully considering your surroundings, the feeder’s height, and other factors, you can attract a delightful variety of feathered friends. With these tips, you’re fully equipped to enjoy the beauty and joy of birdfeeding in your backyard.
Attracting Various Bird Species to Your Homemade Feeder
Creating a homemade bird feeder is a rewarding project that can bring a variety of bird species to your backyard. Not only does it provide a food source for our feathered friends, but it also offers an opportunity for you to connect with nature. To attract different birds, it’s essential to consider their unique feeding habits and preferences. Here are some strategies to make your feeder a beacon for various bird species.
Select the Right Location
Choosing the perfect spot for your bird feeder is crucial. Different bird species prefer specific environments. Here are some factors to consider:
- Access to Shelter: Position your feeder near trees or shrubs. This provides birds with a place to hide from predators.
- Distance from Windows: Place your feeder at least 3 feet away from windows to prevent birds from flying into them.
- Sunlight: Select a spot that receives morning sunlight. It helps keep the feeder dry and the seeds fresh.
Choose the Right Feed
Different bird species have varying dietary needs. By offering a mix of birdseed and other food types, you can attract a broad range of birds. Here are some popular bird feeds:
- Sunflower Seeds: These are a favorite for many birds like cardinals, chickadees, and finches.
- Nyjer (Thistle) Seeds: This tiny seed is adored by goldfinches and pine siskins.
- Safflower Seeds: These seeds can attract cardinals while deterring some unwanted species like squirrels.
- Peanuts: Whole or shelled peanuts draw in jays and woodpeckers.
Offer Varied Food Options
To keep birds coming back, you should diversify the food you provide. Consider adding:
- Suet Cakes: These high-energy treats are perfect for attracting woodpeckers and nuthatches.
- Fruit: Offer pieces of apple, orange, or berries to entice robins and mockingbirds.
- Nectar: Create a simple sugar-water solution to attract hummingbirds.
Maintain Cleanliness
A clean feeder not only looks pleasing but is essential for birds’ health. Moldy or spoiled food can lead to illness in birds. Here’s how to keep your feeder clean:
- Regular Cleaning: Clean your feeder every two weeks with hot, soapy water. Rinse it thoroughly before refilling it.
- Rotate Feed: Use fresh feed and discard any old or wet seed that may have accumulated.
Provide Fresh Water
Like food, water is a vital resource for birds. A shallow birdbath or a small dish filled with fresh water can attract various species. Consider these tips for water sources:
- Keep It Shallow: Ensure that the water level isn’t too deep. Birds prefer shallow baths they can easily access.
- Change Water Daily: Replace the water every day to keep it clean and free from debris.
- Provide Heated Water: In winter, a heated birdbath can be a lifesaver for many birds.
Use Appropriate Feeders
The type of feeder you use can influence which birds visit. Here are some feeder styles:
- Platform Feeders: These open designs attract a variety of ground-feeding birds.
- Tube Feeders: These feeders are perfect for ensuring quality access for smaller birds like finches.
- Hopper Feeders: With a larger capacity, these can accommodate many birds at a time.
Creating a welcoming environment in your backyard can lead to an exciting birdwatching experience. By following these tips, you can attract a variety of species to your homemade feeder. Enjoy observing nature and the beauty of different birds visiting your outdoor space!
Conclusion
Creating a bird feeder out of wood is not only a rewarding DIY project but also a wonderful way to connect with nature. By following the step-by-step guide, you can craft a functional and attractive haven for birds in your backyard. Choosing the right tools and materials ensures your feeder is durable, while exploring various design ideas allows you to personalize your project to fit your garden’s aesthetic.
Once your feeder is constructed, selecting the ideal location is crucial for attracting an array of bird species. Position your feeder near trees or shrubs, which offer birds a sense of safety and easy access to food. This strategic placement will increase your chances of sighting a diverse range of feathered friends.
To further entice different birds, consider the types of seeds you use. Each species has preferences, so experimenting with a mix can yield exciting results. Regularly refilling your feeder and maintaining its cleanliness will also encourage return visits.
By putting these tips into action, you not only provide a valuable resource for local birds but also bring beauty and life into your garden. Whether you’re an experienced woodworker or a complete beginner, making a wooden bird feeder is an enjoyable venture that benefits both you and your avian visitors. Embrace the joy of observing your handiwork being enjoyed, and watch as your yard transforms into a lively sanctuary for birds. Happy birdwatching!