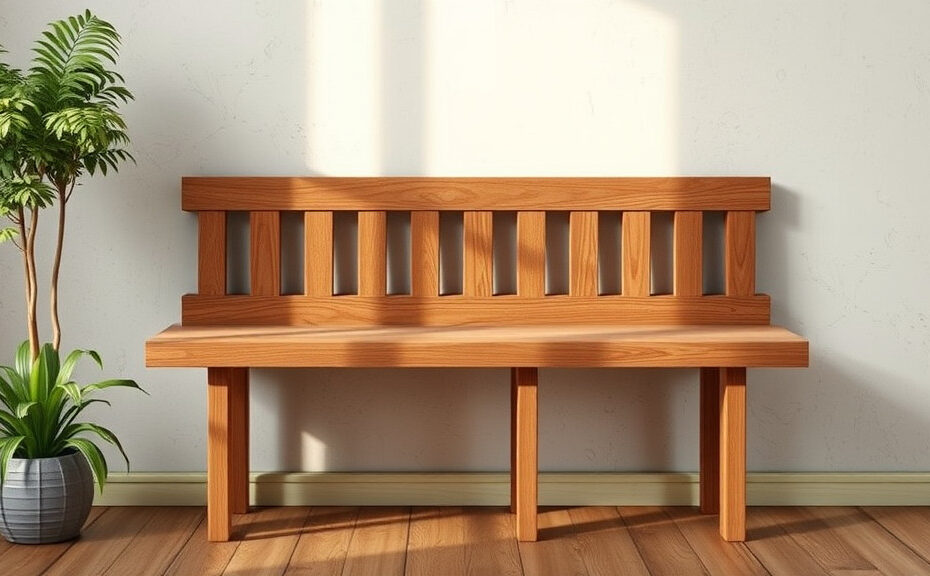
Step-by-Step Guide on How to Build a Bench Seat Against a Wall
Building a bench seat against a wall is a great way to maximize space, add seating, and create a cozy atmosphere in your home. Whether you want to enhance your dining area or create a snug reading nook, a bench seat can easily fulfill these needs. Here’s a step-by-step guide to help you create a beautiful and functional bench seat.
Gather Your Materials
To get started, you will need a variety of materials and tools. Here’s a list to help you prepare:
- 2×4 lumber (for the frame)
- 3/4-inch plywood (for the seat and backrest)
- Wood screws
- Wood glue
- Sandpaper
- Wood stain or paint
- Measuring tape
- Level
- Drill
- Saw
Plan Your Design
Before you start cutting wood, take some time to visualize your bench design. Consider the following factors:
- Size: Measure the space where the bench will go. Make sure it will fit comfortably against the wall without causing obstruction.
- Height: Decide how high you want the seat to be. A standard bench seat is about 18 inches from the ground.
- Style: Your bench should match your home’s décor. Will it have a rustic finish or a modern look?
Once you have your design in mind, sketch it out to have a visual guide as you build.
Cut Your Lumber
Using your saw, cut the 2x4s according to your design. Typically, you’ll need:
- Two pieces for the long sides
- Two pieces for the short ends
- Several pieces for support beams
Make sure all cuts are straight and measure twice before cutting to avoid mistakes.
Assemble the Frame
Now it’s time to build the frame. Follow these steps:
- Lay Out the Long Pieces: Start by laying the two long pieces of 2×4 on the ground parallel to each other.
- Add Short Pieces: Attach the short pieces at each end to form a rectangle. Secure with wood screws and glue for extra strength.
- Add Support Beams: Insert support beams in the center for added stability. Use additional 2×4 pieces to ensure the frame can hold weight.
- Check Level: Before proceeding, use your level to make sure the frame is even.
Attach the Plywood Seat
Next, attach the plywood to the top of the frame. Here’s how to do it:
- Measure and Cut Plywood: Cut a piece of plywood to match the dimensions of the frame.
- Secure It: Place it on top and secure it with wood screws along the edges, ensuring it is flush with the frame.
- Sand the Edges: Use sandpaper to smooth any rough edges for safety and visual appeal.
Create the Backrest
If you like, add a backrest for comfort. Here’s how:
- Cut More Plywood: Cut another piece of plywood to your desired height for the backrest.
- Attach It to the Wall: Use brackets or wood screws to secure the backrest to the wall. This adds stability and keeps the backrest in place.
- Secure to the Seat: Additionally, attach the bottom of the backrest to the bench seat for more support.
Finishing Touches
With the structure complete, it’s time to finish your bench:
- Sand Smooth: Ensure all surfaces are sanded down to remove splinters and rough edges.
- Choose a Finish: Decide whether to stain or paint your bench. This will protect the wood and match your decor.
- Apply the Finish: Follow the instructions for your chosen product and allow it to dry as recommended.
Find cushions or throws to make your bench seat comfortable and inviting.
Building a bench seat against a wall doesn’t have to be a daunting task. By following these steps, you can create a stylish and functional addition to your home. Happy building!
Essential Tools and Materials Needed for Your Bench Seat Project
Building a bench seat against a wall can be a rewarding project, adding both function and style to your space. However, before you get started, it’s essential to gather the right tools and materials. This will ensure your project runs smoothly and yields high-quality results. Let’s explore what you’ll need for your bench seat project.
Essential Tools
Having the right tools at your disposal can make a significant difference in how well your bench seat project goes. Here’s a list of the essential tools you’ll need:
- Measuring Tape: Accurate measurements are crucial for ensuring that your bench seat fits perfectly against the wall.
- Pencil: Use a pencil for marking dimensions on your materials. A mechanical pencil can be great for precise lines.
- Level: A level helps you ensure that your bench seat is even, preventing any wobbling or leaning.
- Saw: Depending on your design, you may need a circular saw, miter saw, or handsaw to cut your wood to the correct lengths.
- Drill: A power drill is necessary for making pilot holes and driving screws into your materials.
- Screwdriver: A good screwdriver is essential for assembling different parts of the bench seat.
- Sandpaper or Orbital Sander: Smoothing the edges and surfaces of your wood will make it more comfortable and aesthetically pleasing.
- Clamps: These will hold your materials securely in place while you assemble the bench.
- Paintbrush or Roller: If you plan to paint or stain your bench, you’ll need a brush or roller for application.
Materials Needed
With your tools at the ready, it’s time to gather your materials. The type of materials you use will vary based on your design preferences, but here are the basics:
- Wood: The fundamental material for your bench seat. Common choices include:
- Plywood – budget-friendly and easy to work with.
- Solid wood – for a more durable and high-end finish.
- Screws: Choose wood screws that fit the thickness of your boards.
- Wood glue: Adding wood glue to your joints can provide extra strength.
- Finishing Products: Paint, stain, or sealant to protect and enhance the look of your bench seat.
- Upholstery fabric or cushions: If comfort is a priority, consider adding cushions or upholstered seating.
Optional Enhancements
Depending on your design preference and budget, you may also want to consider some optional enhancements for your bench seat:
- Storage Containers: Build storage compartments into the bench for added functionality.
- Legs or Brackets: If you want to elevate your bench seat off the ground, consider using legs or wall brackets for support.
- Decorative Trim: Adding trim or molding can give your bench a more finished look.
Safety Gear
Don’t forget about safety when undertaking a project like this. Here are some important safety items:
- Safety Goggles: Protect your eyes when using saws and drills.
- Dust Mask: Wearing a mask will help you avoid inhaling sawdust when cutting wood.
- Ear Protection: Power tools can be loud, so use earplugs or earmuffs to protect your hearing.
Gathering all these tools and materials beforehand will make your bench seat project enjoyable and efficient. Depending on the design and complexity, your bench seat can become a beautiful feature of your home, providing both functionality and style. So roll up your sleeves, and let’s get building! Your new bench seat awaits!
Design Ideas for Stylish Bench Seats That Maximize Space
Creating stylish bench seats can significantly enhance your home’s appearance while optimizing space efficiently. Whether in a small apartment or a spacious house, bench seats against walls provide functional seating and can act as a decorative element. Here are some design ideas that will help you craft beautiful bench seats to maximize your space.
Utilize Built-In Benches
Built-in benches are a fantastic way to save space. These seats can fit neatly against walls, providing more room in the center of a room. You can design them with storage underneath, perfect for stowing away cushions or blankets.
- Materials: Consider using wood for a classic look or plywood for a modern design.
- Style: Match your bench with the existing décor for a cohesive appearance.
- Custom Dimensions: Tailor the size to fit your space, ensuring comfort and accessibility.
Incorporate Cushions and Throws
Adding cushions and throws can instantly elevate the comfort and style of your bench seat. Opt for a mix of patterns and textures to create a more inviting setting.
- Color Palette: Choose colors that complement your room for a harmonious look.
- Sizes: Use various cushion sizes to add visual interest.
- Seasonal Changes: Switch out cushions seasonally for a fresh look throughout the year.
Go for a Multi-Functional Bench
A multi-functional bench is a smart investment for any space. These versatile pieces can serve as seating, storage, and occasionally, a dining area. Custom build one that suits your needs.
- Storage Options: Incorporate drawers or compartments.
- Extendable Features: Look for designs that can convert to a coffee table or dining surface when needed.
- Design Consistency: Maintain a consistent design with other furniture in your space.
Embrace Open-Concept Styles
Open-concept living continues to be a popular trend. Bench seats can act as room dividers, creating distinct areas within a large space without obstructing views. Utilize benches to separate living rooms from dining areas seamlessly.
- Low Benches: Keep the height low to maintain an open feel.
- Finishing Touches: Use decorative elements, like plants or books, to enhance the divide.
- Color Blocking: Choose a color that contrasts with the surrounding space for added definition.
Incorporate Natural Elements
Using natural materials can add warmth and a touch of elegance to your bench seat. Consider wooden benches or those upholstered in natural fabrics. Pairing them with elements like plants can create a serene, inviting space.
- Wood Varieties: Depending on your theme, you may prefer oak, pine, or walnut.
- Sustainable Choices: Opt for sourced wood responsibly, ensuring environmental consideration.
- Complementary Decor: Place potted plants or sculptures on your bench for an artistic touch.
Design with Shapes
Playing with shapes can bring added flair to your bench seating. Consider round benches, triangular designs, or even sectional styles for the ultimate in creativity and comfort.
- Curved Seating: A curve in your design can soften your space, creating a more inviting atmosphere.
- Segmented Benches: Use multiple small benches rather than one long piece for a flexible arrangement.
- Outdoor Options: Secure weatherproof materials if you decide to extend your designs to patio areas.
Implementing these design ideas for stylish bench seats not only maximizes your space effectively but also enhances the aesthetic of your living areas. Remember, the key is to balance functionality with style to create benches that work beautifully in your home.
Common Mistakes to Avoid When Building a Bench Seat
Building a bench seat can transform your space, adding both functionality and style. However, common mistakes can turn your project into a frustrating experience. To help you build a perfect bench seat against a wall, it’s vital to avoid these pitfalls.
Before reaching for tools, take time to plan your bench seat. Measure the area accurately and consider the size of the bench in relation to the surrounding space. An overly large bench can make the room feel cramped, while a tiny one may feel out of place. Sketch your design and visualize the final result.
Comfort is a crucial factor when building a bench seat. Many people overlook the importance of adequate seating height and depth. Be sure to choose a height that’s comfortable for sitting and a depth that offers enough space for lounging. A depth of 18 to 20 inches is typically ideal for most benches. Additionally, using cushioned pads can greatly enhance comfort.
Selecting the wrong materials can lead to numerous issues down the line. Consider the usage and environment where the bench will be placed. If you’re building a bench for an indoor area, high-quality plywood or hardwood will work well. For outdoor settings, opt for weather-resistant wood or composite materials that withstand the elements.
Your bench seat must be strong enough to support weight without wobbling. Many builders skip reinforcement, thinking that a simple frame will suffice. Instead, consider adding bracing beneath the seat to provide extra stability. Wooden brackets or metal braces can do wonders for preventing sagging.
Certain features can enhance the functionality of your bench seat. Will it serve as a storage space? If yes, build in under-seat compartments. If you want a more social setup, think about angling the bench or adding a table. Ensure your design aligns with how you plan to use the space.
Many DIY builders underestimate the weight their bench will need to support. This mistake can lead to dangerous situations. Always have an idea of how many people will typically use the bench and calculate the total expected load. As a general rule, your bench should support at least 300 lbs. Test the stability of the bench before regular use.
A well-finished bench not only looks appealing but also lasts longer. Many builders rush through this stage or skip it altogether. Sand the surface to remove rough edges, and apply a protective coat based on the material used. Paint, varnish, or even outdoor sealants can enhance durability and resist wear.
When installing the bench against a wall, proper alignment is critical. An incorrectly aligned bench can throw off the entire look of the room. Use a level to ensure that your bench is even, both horizontally and vertically. Doing so will ensure your bench is not only visually appealing but also safe for use.
While designing your bench seat, ensure that it is accessible to everyone who might use it. Allow enough clearance around the seat for easy access. If you’re building for a specific demographic, such as children or those with mobility issues, make sure the bench height and access point accommodates their needs.
Sometimes the best insights come from those around you. Once you have a plan in place, share it with family or friends. They can offer valuable feedback that may help you see things you didn’t notice. Engaging others can lead to better ideas and improvements on your design.
By avoiding these common mistakes when building a bench seat against a wall, you’ll be on your way to creating a sturdy and stylish seating solution for your space. Take your time with planning and execution, and enjoy the satisfaction of a job well done!
Maintenance Tips to Keep Your Bench Seat Looking New
Having a bench seat can greatly enhance the comfort and aesthetics of your living space. However, just like any piece of furniture, it requires some attention to keep it looking fresh and inviting. Here are some practical maintenance tips to ensure your bench seat remains in top-notch condition.
Regular Cleaning
Dust and dirt can accumulate quickly on your bench seat. Regular cleaning is crucial to prevent the buildup of grime and stains. Here’s how to clean it effectively:
- Weekly Dusting: Use a soft cloth or a microfiber duster to gently wipe down the surface of your bench seat. This helps remove surface dust.
- Vacuuming: For upholstered seats, use a vacuum with an upholstery attachment at least once a month. This will help lift away debris trapped in the fibers.
- Spot Cleaning: If you notice any spills or stains, address them immediately. Blot the area with a cleaning solution suitable for the fabric or material, rather than rubbing it in.
Choose the Right Cleaning Products
Using the correct cleaning products is vital for maintaining the integrity of your bench seat. Here’s what to consider:
- Upholstery Cleaner: If your seat is upholstered, look for cleaners that are specifically designed for fabrics.
- Wood Polish: For wooden bench seats, choose a natural wood polish or a cleaner that is free from harsh chemicals.
- Test First: Before applying any cleaner on a visible area, always test it on a small hidden spot to ensure it won’t damage the material.
Avoid Sun Damage
Sunlight can fade and damage the fabrics of your bench seat. If your bench seat is in direct sunlight, consider these options:
- Use Window Treatments: Curtains or blinds can help reduce the sun’s impact.
- Consider UV Protection: If replacing fabric or upholstery, consider options with UV protection or treatment.
- Regularly Rotate Cushions: If your bench seat has removable cushions, rotate them regularly to ensure even exposure to light.
Maintain Stability and Structure
It’s essential to ensure that your bench seat remains stable and structurally sound over time. Here are some steps to consider:
- Check Screws and Bolts: Regularly inspect and tighten screws, bolts, or any joints to prevent wobbling.
- Replace Worn Parts: If you notice any part is damaged, replace it promptly to avoid further damage.
- Use Protective Felt Pads: Place felt pads on the bottom of the legs to protect your floor and reduce noise.
Protect Against Moisture
Moisture can lead to mold and mildew, particularly in fabric benches. Protect your seat by:
- Using a Dehumidifier: In damp areas, using a dehumidifier can help keep moisture levels low.
- Applying Water-Resistant Spray: If your fabric allows, consider applying a water-resistant spray to add a layer of protection.
Reupholstering and Refinishing
Over time, your bench seat may need a refresh. Keeping it simple, here’s how to approach it:
- Evaluate Wear and Tear: Check for any significant damage that might warrant a complete reupholster or refinishing.
- DIY vs. Professional: Decide if you want to tackle the project yourself or hire a professional. If you’re inexperienced, a professional is often a better choice.
- Choose Quality Materials: When reupholstering, select high-quality fabrics or finishes that will endure wear and tear.
By following these maintenance tips, you can ensure your bench seat stays looking new for years to come. With a little care and attention, your bench can continue to be a stylish and functional piece in your home.
Conclusion
Building a bench seat against a wall can be a rewarding project that enhances your living space while providing functional seating. By following the step-by-step guide, you can navigate the construction process confidently. Remember that having the essential tools and materials close at hand will streamline your work and ensure that you don’t run into delays.
Don’t forget to let your creativity shine through your design choices; incorporating stylish ideas can transform a simple bench into a stunning focal point that maximizes your available space. While executing your project, it’s crucial to learn from common pitfalls. Avoiding mistakes like miscalculating dimensions or skimping on support can save you time and effort later on.
After your bench seat is built, maintaining its appearance and longevity will keep it looking great for years. Regular cleaning, protective treatments, and prompt repairs are simple yet effective strategies to preserve its condition. With these tips in hand, you’re well-equipped to tackle your bench seat project successfully. Embrace the challenge, enjoy the process, and take pride in adding a stylish and practical feature to your home that caters to your needs and boosts your space’s aesthetic appeal.